The below description will help you with installing WordPress from your cPanel control panel using Softaculous.
- To begin the WordPress installation on your website, access your website’s admin panel (cPanel) by logging in. Typically, you can find it at either yourwebsite.com/cpanel or yourwebsite.com:2082.
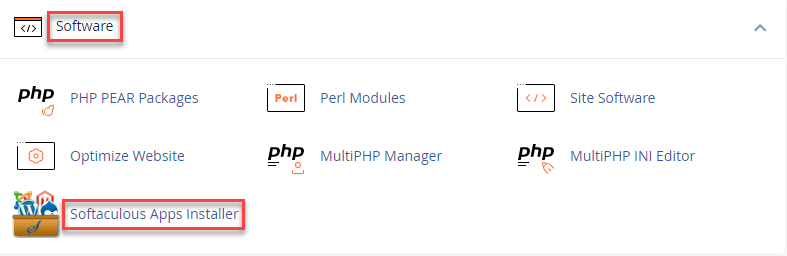
- You must now scroll down until you find Software/Services where you can see Softaculous. There are multiple scripts offered by Softaculous, but here we are interested in installing WordPress, if you intend to install some other web application, the process would be more or less similar.
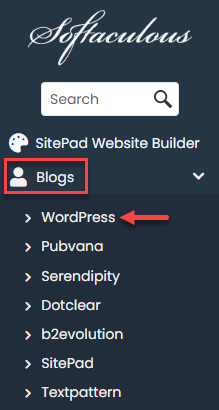
- Scroll down to Blogs. Look for the WordPress link and Click it. You should find the link on the left-hand sidebar in Softaculous.
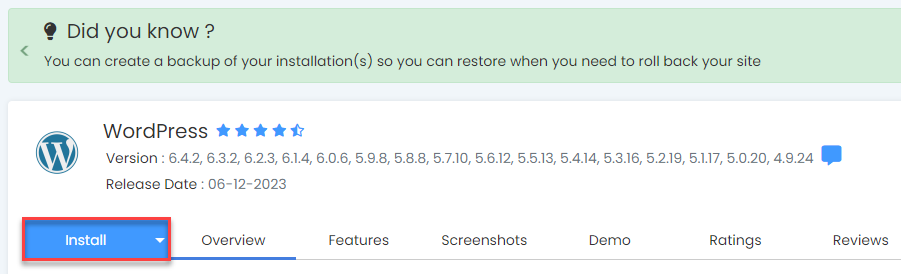
- Once in, you can view a brief information regarding WordPress. Look for the Install link placed above the header to initiate the installation. Click Install.
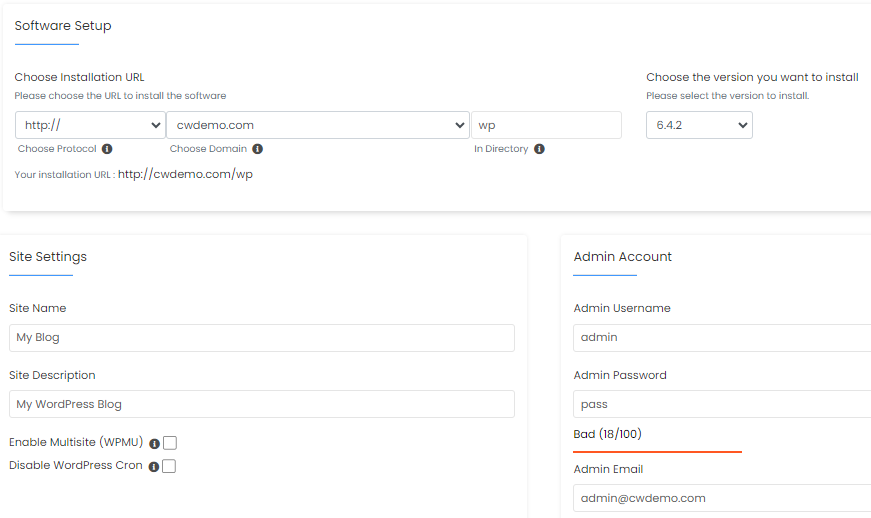
- Softaculous will automatically fill in default settings, but you may want to customise them-
- At the top of the page, you will have to select the domain where you wish to install WordPress. Select the directory to install WordPress on. It will fill the box with the default install destination to yourwebsite.com/wp.
- You would be required to populate the empty boxes. For In Directory type the name of a new directory you would like created. The box would be left blank to install the software into your main directory by default. Once you are done, click Install.
- Add a name and description for your website, and type in your desired administrator username, password, and email address. If you wish to have a secure key (password), you must click the key logo and get a randomly generated password. Then click Install.
- You will now see a confirmation page for your installation.
- You may access the link by going to your WordPress admin page or typing “yourwebsite.com/wp-admin” in the browser. You must now use the login name (username) and password that you had set during the installation.
- At the first login, you will be prompted to change your password. You can ignore this by clicking the link that says “No Thanks, Do not remind me again”.
This concludes the installation.
WordPress Hosting is one of the widely used hosting solutions due to the flexibility and simplicity it offers.
The below description will help you with installing WordPress from your cPanel control panel using Softaculous.
Step 1 : You must first login to your website’s admin panel to initiate the WordPress installation on your website. Usually, you can locate it at yourwebsite.com/cpanel or yourwebsite.com:2082.
Step 2 : You must now scroll-down until you find Software/Services where you can see Softaculous. There are multiple scripts offered by Softaculous, but here we are interested in installing WordPress, if you intend to install some other web application, the process would be more or less similar.
Step 3 : Scroll-down to Blogs. Look for the WordPress link and Click it. You should find link on the left-hand sidebar in Softaculous.
Step 4 : Once in, you can view a brief information regarding WordPress. Look for the Install link placed above the header to initiate the installation. Click Install
Step 5 : Softaculous will automatically fill in default settings, but you may want to customize them.
At the top of the page, you will have to select the domain where you wish to install WordPress. Select the directory to install WordPress on. It will fill the box with the default install destination to yourwebsite.com/wp.
You would be required to populate the empty boxes. For In Directory type the name of a new directory you would like created. The box would be left blank to install the software into your main directory by default. Once you are done, click Install.
Step 6 : Add a name and description for your website, type in your desired administrator username, password, and email address. If you wish to have a secure key (password), you must click the key logo and get a randomly generated password. Then click Install.
Step 7 : You will now see a confirmation page of your installation
Step 8 : You may access the link to go to your WordPress admin-page or type “yourwebsite.com/wp-admin” in the browser. You must now use the login name (username) and password that you had set during the installation.
Step 9 : At the first login, you would be prompted to change your password. You can ignore this by clicking the link that says “No Thanks, Do not remind me again”.