If you’re enjoying your free trial and want to publish your newly created website or get access to more features, you’ll want to purchase a website builder package.
So, let us follow a few simple steps to upgrade the website builder from a free trial:
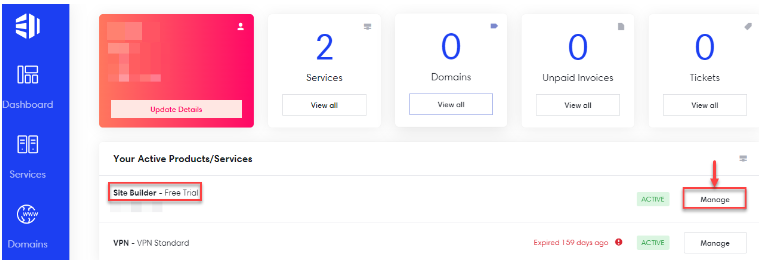
- Log in to your “Client Area”.

- You will enter your “Dashboard”.
- “Site Builder-Free Trial” can be found under the section “Your Active Products/Services.” Click “Manage” from the menu.
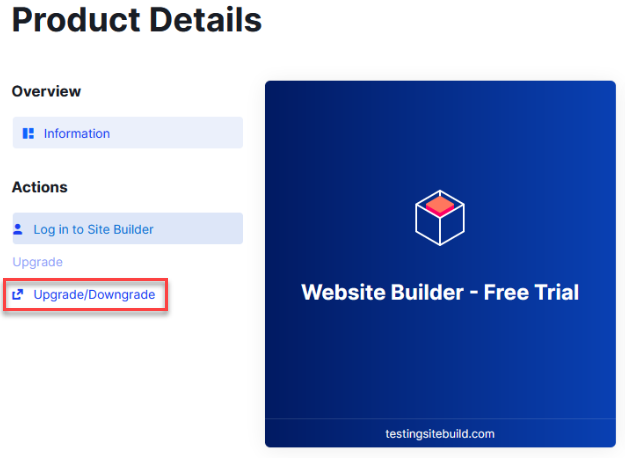
- You will be taken to a new page with the “Product Details”. Select “Upgrade/Downgrade” from the menu.
- Select the product of your choice.

- Proceed to next step and click on the “Checkout” button.
- After the new package has been paid for and activated, login to the client area.
- Scroll down to “Addons and Extras” option and click on the “Purchase and Activate” button.

- After clicking on Purchase and Activate, an addon will appear in the Client Area which will look like:
- You may login to the site builder and start creating your new website.
Note: The website created in Free Trial will not appear once the package has been upgraded to one of the paid packages. You will need to start creating website from scratch with the upgraded package.
Hope you liked our guide. If you may need any assistance while completing the upgrade process, you can directly contact our 24/7 support specialists. Also, don’t forget to check out our latest web hosting plans today.