VMware Workstation Tutorial
VMware is a virtualization program. With this program you can install multiple operating systems virtually on our computers. You can test or test different operating systems without changing anything in our system.
Many times we want to upgrade to Linux for example, but we dare not and we do not know whether we will be capable of running that operating system. VMware-workstation can help you solve this problem because we can try as many operating systems we want on our machine. VMware-workstation is compatible with all versions of Windows and can be installed on 64-bit systems; there is also a version for Linux.
Installation:
After opening the program you will see the screen where we have to accept the license agreement as shown in the following figure.
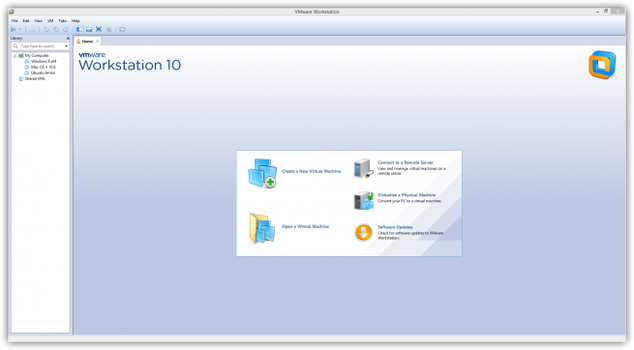
Once we accept the license agreement, we show the main program window, which show us three main options as shown in the following image, which are:
New Virtual Machine: This will be the option we use in this manual because it is responsible for creating virtual machines.
New Team: With this option we add our virtual private network area machines.
Open or Existing VM Team: open existing virtual machines.
Create a virtual machine:
The first thing we will do is create a new virtual machine, it will press for the NEW VIRTUAL MACHINE option and a wizard will open. Just we need to press next to continue.
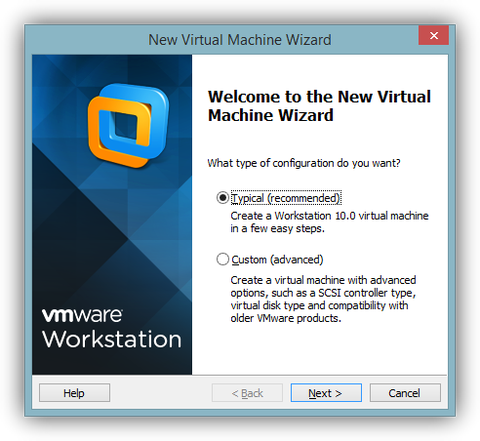
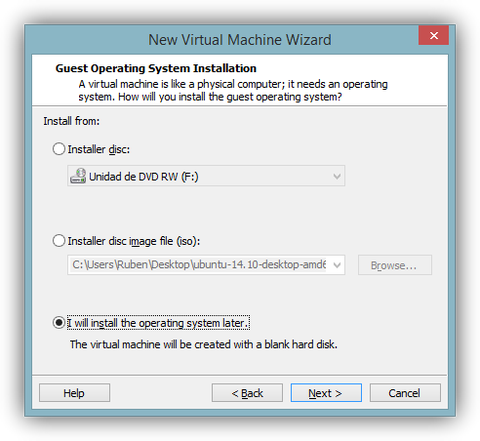
This step asks us if we want to create our machine with a preset options (Typical) or if instead we who’s set those options (Custom). The (typical) option to be VMware who set the configuration and will press Next to continue. The next step is to indicate from which medium will install the operating system.
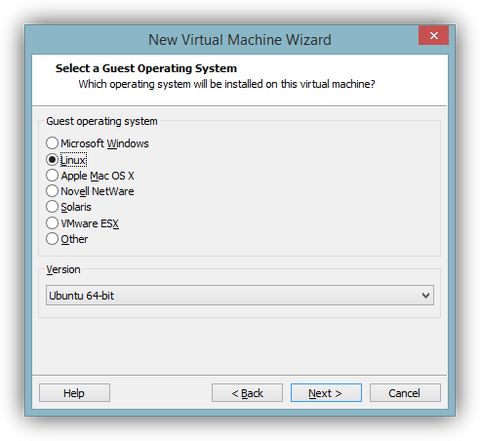
The next window asks what the operating system will load in our virtual machine, I chose Windows Ubuntu, once selected click on Next to continue.
Now we choose the name and location to save the virtual machine.
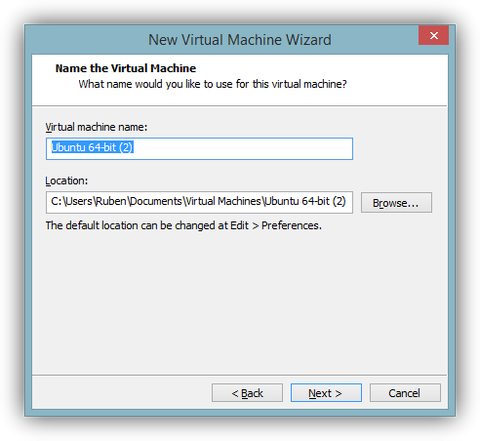
Clicking on the tab that says Browse will open a window where you navigate the hard disk to find the folder which will save our virtual machine once selected click on Next to continue.
Now we have to choose the capacity of our virtual machine. It shows 2 options are:
• Allocate all disk space now – allocate all disk space now
• Disk split into 2GB files – disk divided into 2 GB
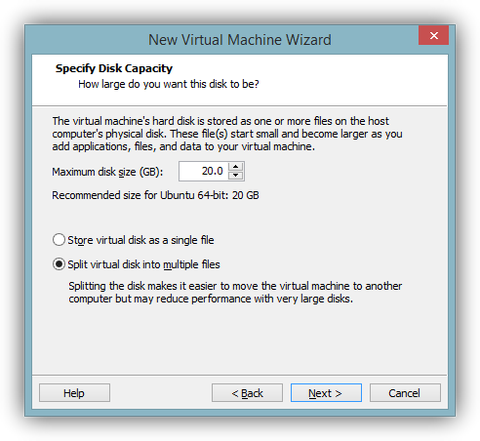
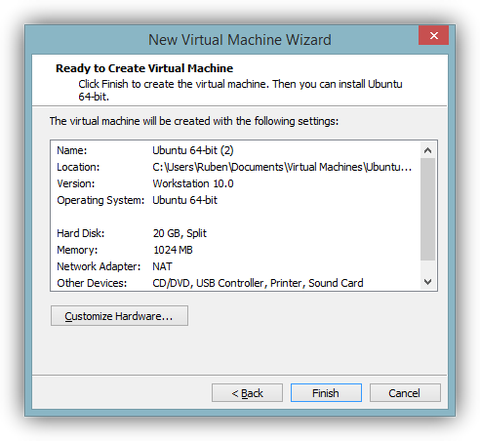
I’ve left unchecked the option, once done press finish. If everything went well, we display a window indicating that the virtual machine was created.
Install an online System:
This is the main window of VMware Workstation,