In this tutorial, we’ll show you how to set up a database and a database user in Plesk.
Follow the steps:
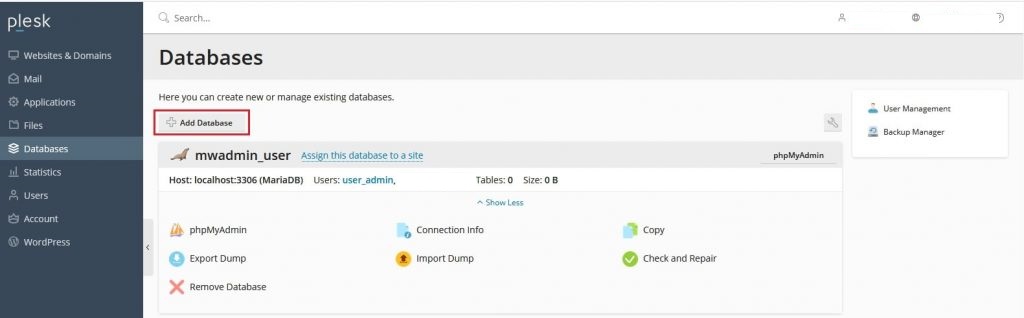
- Open Plesk and log in.

- Select Databases from the menu.
- Click Add Database to create a new database.
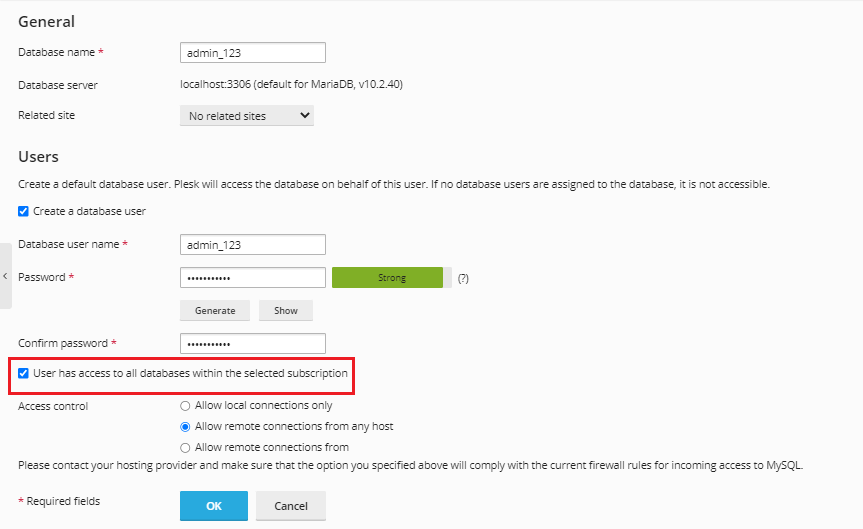
- In the Database name field, type the database’s name.
- Select a database server from the Database server dropdown menu.
- From this option, choose a website to which the database should be assigned.

Note: In the Database user name area, provide the name of the database user you want to create. - In the Password field, type the password. Your password must be alphanumeric, which means it must contain a mix of upper and lower-case letters, digits, and special characters.
- In the Confirm password field, use the same password.
- Simply select ‘Generate’ if you wish to use an auto-generated password. The random password is automatically filled in the Password and Confirm Password sections.
- Select Show to see the password.
- This password should be copied and pasted into a notepad file for future reference.
- You may choose to hide the password.
- Select this checkbox if you wish to grant this user access to all databases created under this subscription.
- You can authorize the user to access the database using these settings in the Access control area.

- This option allows you to exclusively use local connections to access the database.
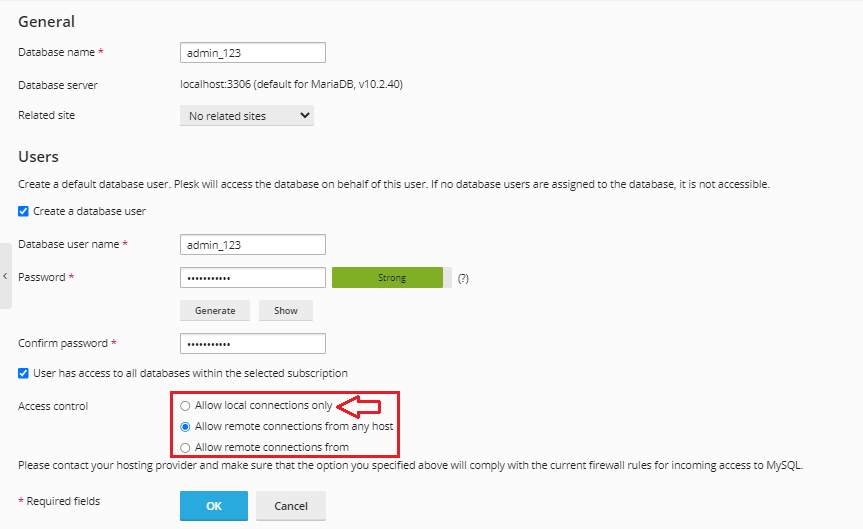
- This option is enabled by default, and it allows you to connect to the database remotely from any host.
- Select this option if you wish to allow remote connections from specific IP addresses or domain names.
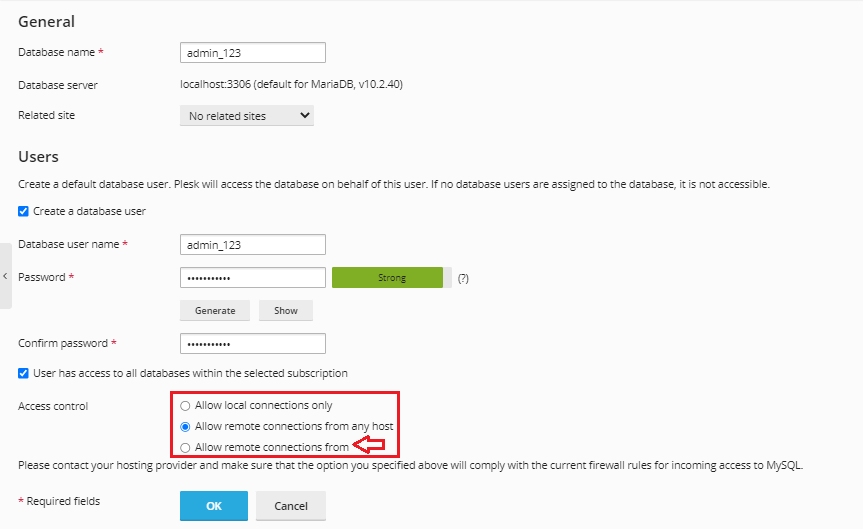
- Here, we have selected the default option.

- Click OK to establish a database and database user.
- You will receive a message congratulating you on your accomplishment.
- User Management is where you’ll find your new database user.
- You can update the username’s settings at any moment by clicking on it.
Following the steps outlined-above helps maintain database integrity and allows smooth interaction between your application and the database.