This guide explains how to clear the DNS Cache on Windows 11 using CMD. It is worth mentioning that you may need to clear the DNS cache when you are experiencing DNS-related issues, such as incorrect or outdated DNS entries. Flushing the DNS cache can help resolve these issues by forcing your computer to query DNS servers for fresh DNS information.
To flush the DNS cache on Windows 11 using Command Prompt (CMD), you can follow these steps:
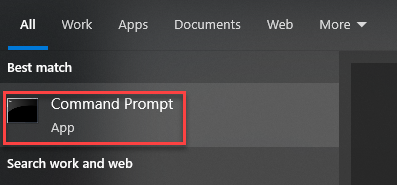
- Open the Command Prompt by pressing the Windows key.

- Type “Command Prompt” and click on the “Command Prompt” app that appears in the search results.
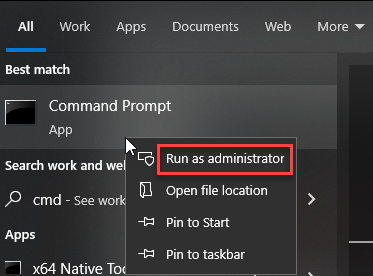
- Right-click on the “Command Prompt” app and select “Run as administrator.” This step is very important, as flushing the DNS cache requires administrative privileges.
- In the Command Prompt window, type the following command and press Enter:
ipconfig /flushdns - The command will quickly execute and clear the DNS cache. Wait for a few moments until you see the message “Successfully flushed the DNS Resolver Cache.”
- Once you see the “Successfully flushed the DNS Resolver Cache” message, the DNS cache on your Windows 11 system has been successfully cleared.
Hope you liked our article and that it was of great use to you. For more such informative KBs, visit eukhosts KB section.
If you’re also using Windows 8 or 10 and need to clear the DNS cache on those systems, check out our detailed guide: How to Flush DNS Cache in Windows 8 & 10