This article explains how to edit your hosts file as it allows you to override DNS entries for any domain by pointing it to a specific IP address. This change only impacts the computer on which it is made, making it especially useful for tasks like testing websites during a migration.
Edit hosts file on Windows 8, 8.1 and 10:
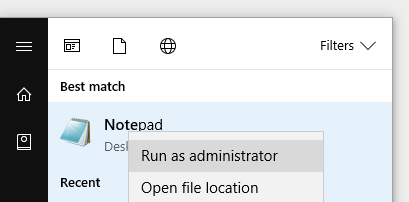
- From your start menu locate Notepad, right-click and select Run as administrator (You may be asked to enter your administrator password at this point).
- From Notepad select Select file > open.
- Navigate to C:\Windows\System32\drivers\etc (this assumes Windows has been installed to the default directory).
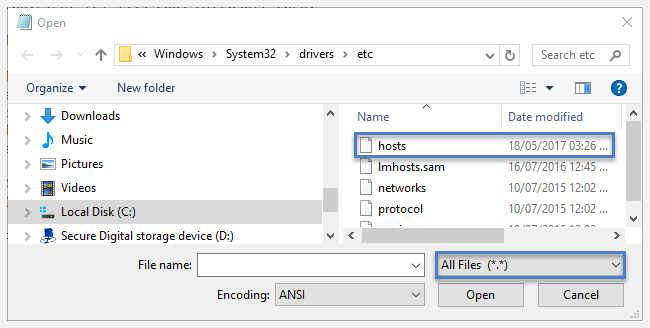
- To the right of Filename select All Files (*.*).
- Open the file named hosts.
- Create a new line at the bottom and enter the IP address of your new website followed by the domain name, for example:
192.168.0.10 myeukwebsite.co.uk www.myeukwebsite.co.uk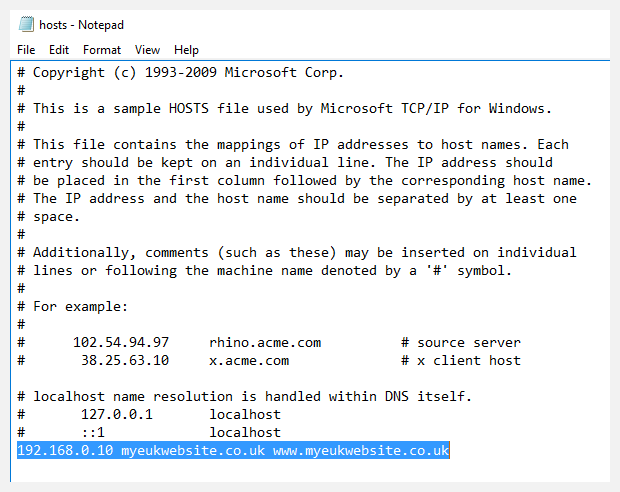
Note: Wildcard entries are not supported within the host’s file, in the example above we have included both the non-www and www versions of the domain. - Select File > save.
The change is immediate, now when you enter your domain into your browser it will resolve to your new website and allow you to test your site before going live.
Disable your hosts file entries:
- If you need to revert so your domain points at the original IP you can either delete the line you entered and save or you can comment it out by prefixing the line with # which allows you to easily switch between your old and new sites for testing.

As soon as you save the change will take effect.
Using Linux or macOS?
The host file and syntax used are standard across almost all operating systems, on Linux or macOS you can find the host file here: /etc/hosts
Once you know where the hosts file is and how to edit it, you can easily update the host entry for Windows for web development purposes.