Setting a custom port for MsSQL remote access is important for managing and securing database connections. By following the steps outlined in this guide, you can set the port to meet your specific needs, increasing the security and performance of your MsSQL Server.
To assign a TCP/IP port number to the SQL Server Database Engine, follow the steps below:
- Open the SQL Server Management Studio and log in to your Database locally.
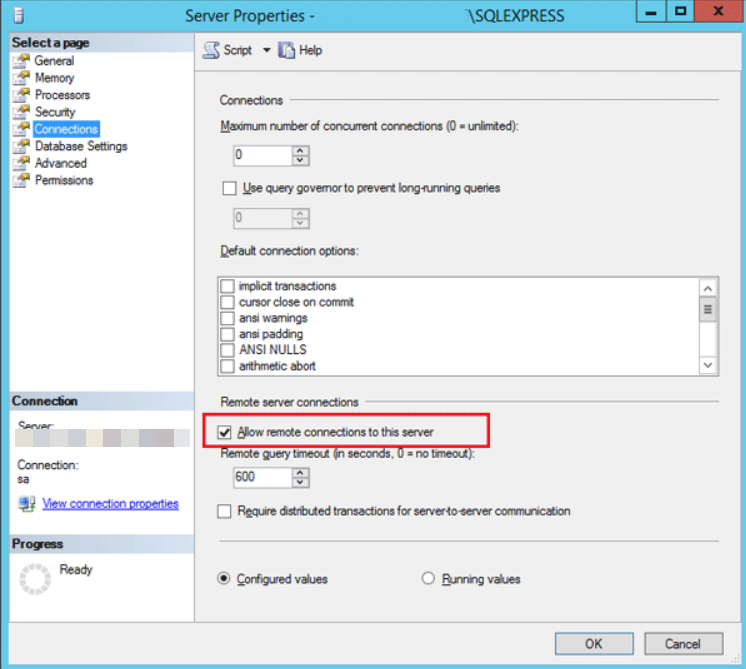
- Right-click on the server name in the left panel and select Properties.
- Select the Connections page on the left side and make sure that the “Allow remote connections to this server” option is checked. Then exit SQL Server Management Studio.
- Now open the SQL Server Configuration Manager and expand the node SQL Server Network Configuration. Then select Protocols for SQLEXPRESS (or whatever the name of your SQL Server instance is).
Make sure that the TCP/IP protocol is enabled.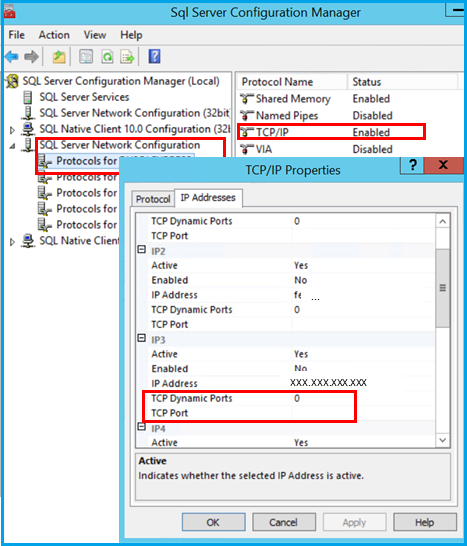
- Right-click on TCP/IP and choose Properties. In the TCP/IP Properties dialogue box, click on the IP Addresses tab and scroll down to IPAII section. Make sure TCP Dynamic Ports is blank and that TCP Port is set to 1433 (or whatever you want to set TCP Port).
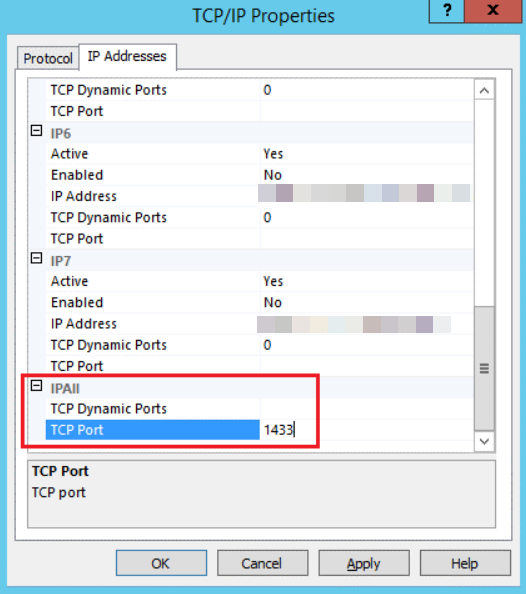
- First, click on the Apply button and then the OK button to save your changes. After that, restart your SQL Server instance.
- Now you can connect to your SQL Server instance remotely using SQL Server Management Studio.
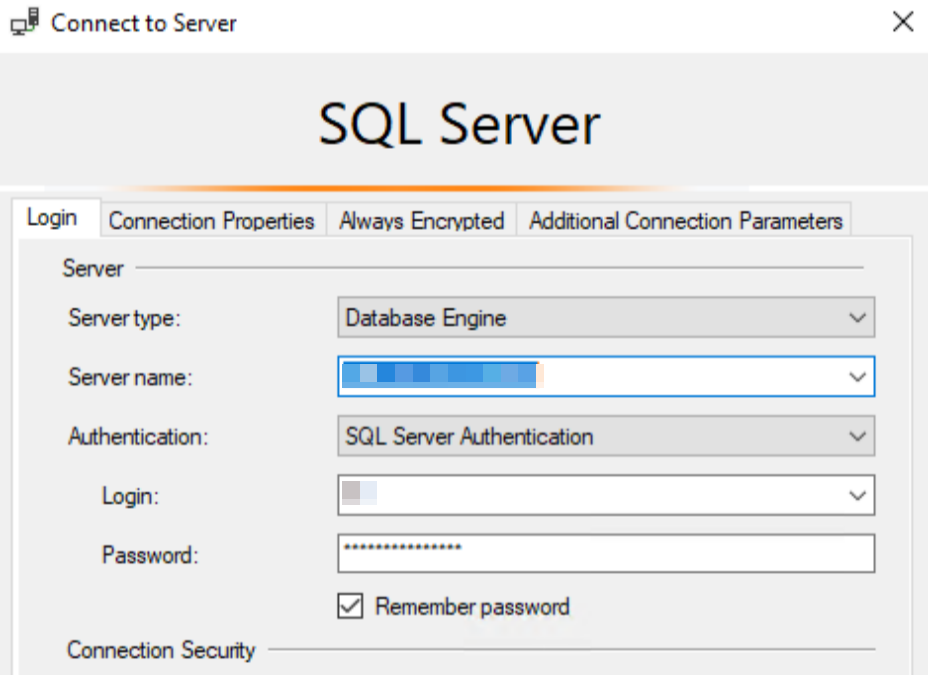
Under the server name, please update your server IP and the custom port which you set on the SQL server.
For example:
Server Name: (e.g. 111.111.111.1,2121)
If there is a problem persisting in the remote connection, you most likely need to configure your firewall settings. Make sure the TCP port 1433 is not blocked by your firewall.
Create a new rule in the firewall settings for remote connection.
Take a look at the following steps
- In the Windows Firewall in Control Panel, click on the Advanced Settings option on the left OR Start >> Run >> Type wf.msc and hit Enter.
- In the Windows Firewall with Advanced Security window that opens, click on the Inbound Rules in the left panel. Click on the New Rule on the right panel of the window.

- Select Port on the list of options and click Next.
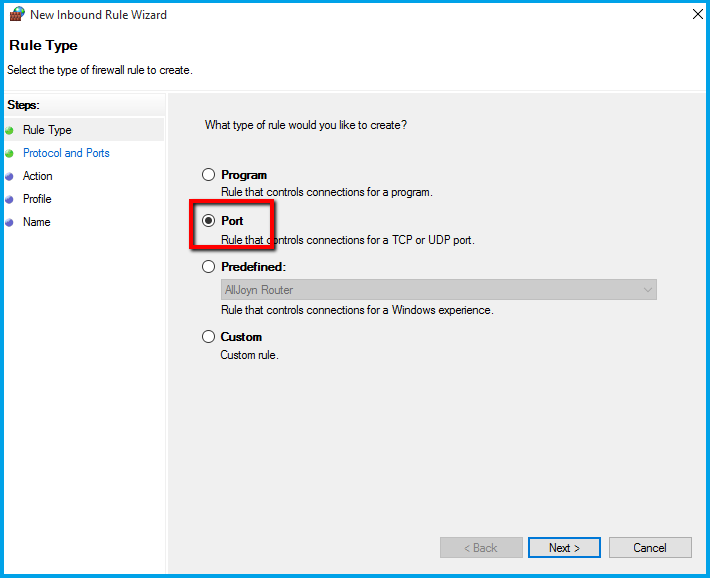
- Select TCP (or UDP if that is what you require) and Specific local ports, and then enter your ports in the text box in front of Specific local ports (i.e. 1234). Click Next.

- Select Allow the connection. Click on Next.

- Select the options that you want from Domain, Private, and Public. Click on Next.
Domain – This rule will be applicable when the computer is linked to a network domain.
Private – This rule will be applicable when the computer is linked to trusted private networks.
Public – This rule will be applicable when the computer is linked to untrusted public networks.
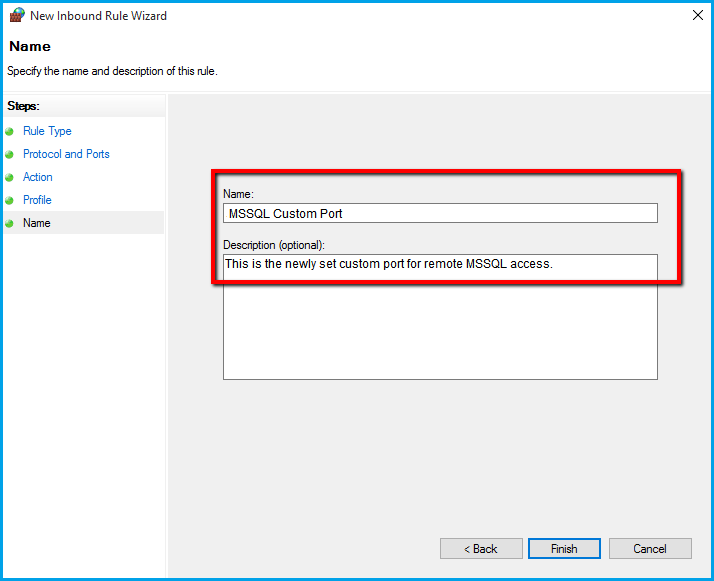
- Finally, enter the Name and Description in the text boxes respectively. Then click Finish.
After following these steps, your port should be allowed through the Windows Firewall.
Also Read: How To Open Ports via WHM