The following tutorial explains to you the backing up and restoration of your MS SQL Server 2019/2022 Database using the Microsoft SQL Server Management Studio.
Microsoft SQL Server Management Studio Express (SSMSE) is a free open source graphical management tool which can be used to manage your SQL Server 2019/22 Express Edition. You can use these backups later if a disaster strikes. It is always better to back up your database because you never know if the information is lost or the database goes corrupt.
The backup file you download will need to be in the “.bak” file extension. Database stored on the shared servers, the backups will be generated on the server itself. If you wish to have a copy of your server backup, then you may need to contact the windows support team.
To backup your MS SQL Server 2019/22 Database on your windows dedicated server hosting platform, follow the steps shown below:
First, you need to configure the Microsoft SQL Server Management Studio on your local machine. If you don’t have it, you can download it from the following location.
How to Install SQL Server Management Studio on the Windows server
- Open your Microsoft SQL Server Management Studio, whichever you prefer, standard or express edition.
- Using your Database Username and Password, simply log in to your MS SQL server database.
- Select the database >> Right-click >> Tasks >> Back Up [as shown in the image below]:

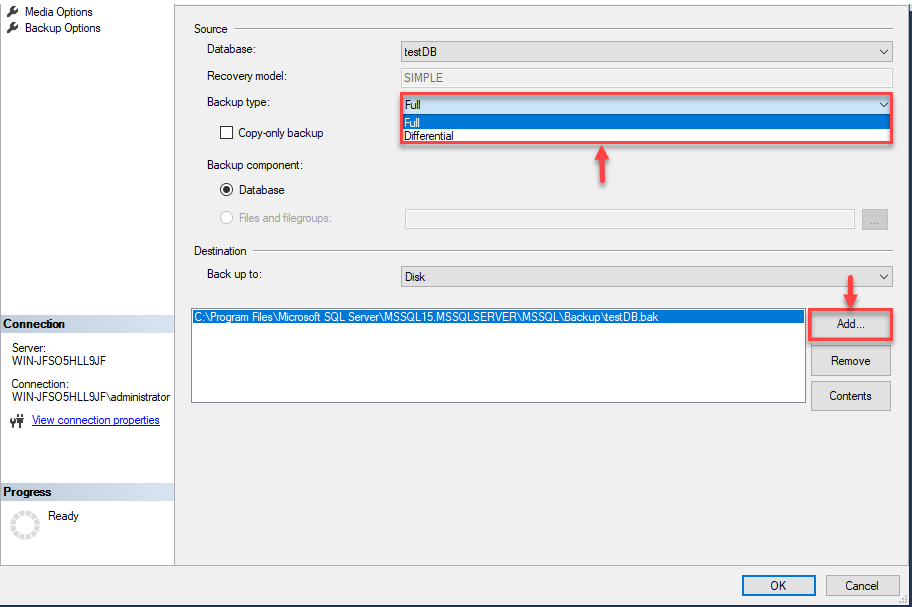
- Once you click on the “Backup” the following Backup Database window will appear.
- Select the following options:
Backup type: Full
Under Destination, Backup to Disk - Now, by clicking on the “Add” button the following window will appear to select the path and file name for the database backup file.
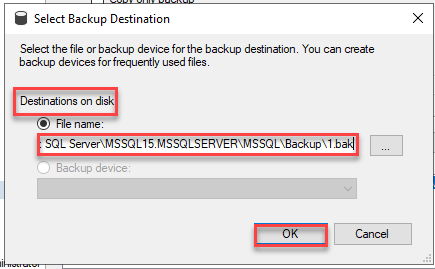
- The destination will be automatically selected but if you want then you can set the backup destination manually as well. For manual set up select the destination folder for the backup file and enter the “File name” with .bak extension [as shown in the image below]:
Note: If you want to save the backup with a custom file name then, select the existing path and click on the “Remove” button. To set the custom backup file name, click on “Add destination” and set the backup file name. Make sure you place your MS SQL database “.bak” file under the MSSQL backup folder.
- Hit the OK button to finish the backup of your MS SQL Server 2019/22 Database. Upon the successful completion of database backup, the following confirmation window will appear with a message “The backup of database “yourdatabasename” completed successfully. [as shown in the image below]:

Following the above-shown steps, you will be able to create a successful backup of your MS SQL Server 2019/22 Database into the desired folder.
How to Restore MS SQL Server 2019/2022 Database Backup File?
To restore a database from a backup file, follow the steps shown below:
- Open your Microsoft SQL Server Management Studio Express and connect to your database.
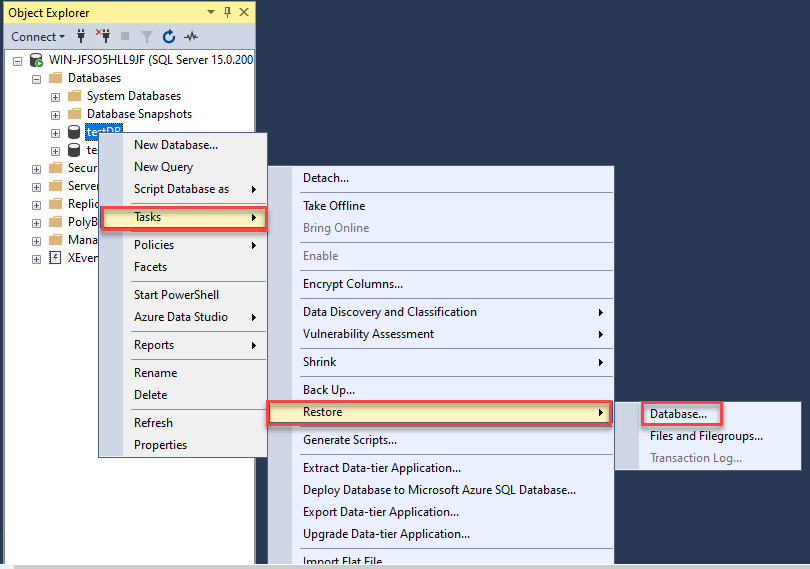
- Select the database >> Right-click >> Tasks >> Restore >> Database [as shown in the image below]:
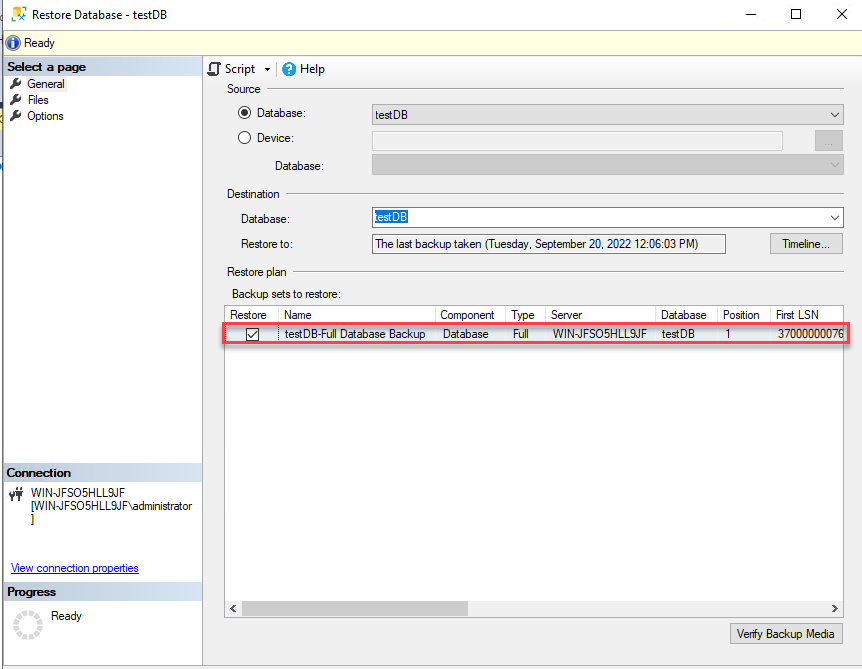
- The following “Restore Database“ windows will appear. Select “From device” mentioned under the “Source for restore” and click the button in front of that to specify the file location [as shown in the image below]:
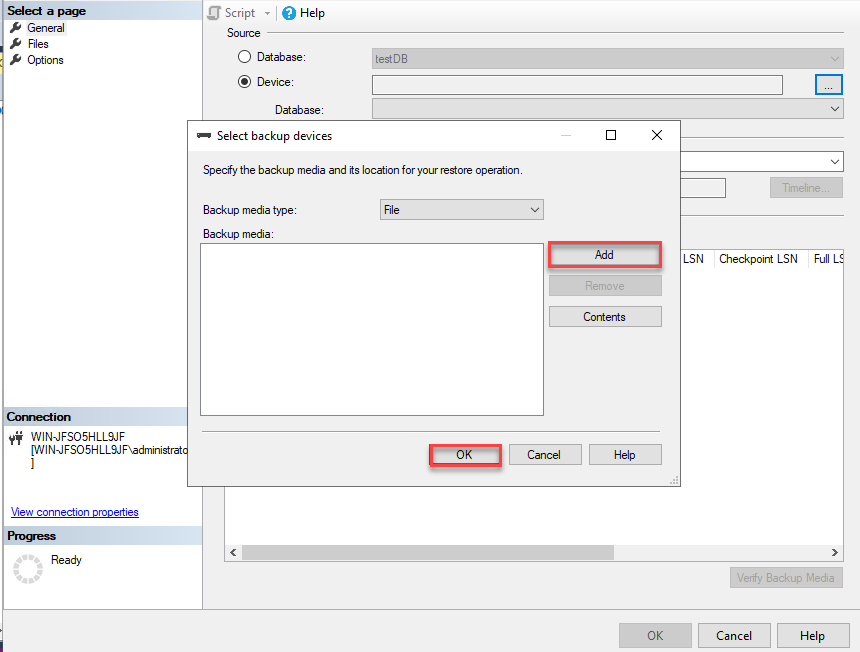
- Select the option “Backup media as File” and click on the Add button to add the backup file location [as shown in the image below]:
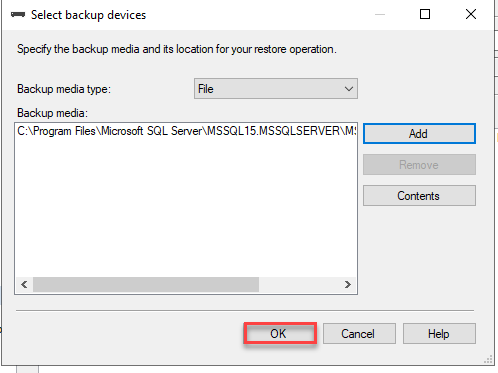
- Select the backup file you wish to restore and Hit the OK button [as shown in the image below]:
- You will get a message that the database has been restored successfully.

That’s it! You will get the confirmation windows with a message “The restoration of database “yourdatabasename” completed successfully.” Now you know the procedure of backing up and restoring the MS SQL Server 2019/22 Database.