Adding and editing DNS records in Cloudflare allows you to control domain settings like email routing, website hosting, and security configurations for optimal performance and accessibility.
Let us follow the steps:
- Log in to your Cloudflare Dashboard.
- Select the domain you want to manage.
- Navigate to the DNS tab.
Here, you’ll see your DNS zone with all existing records (e.g., A, MX, TXT, NS, etc.).

- To Add a New Record:
- Click on “Add record.”
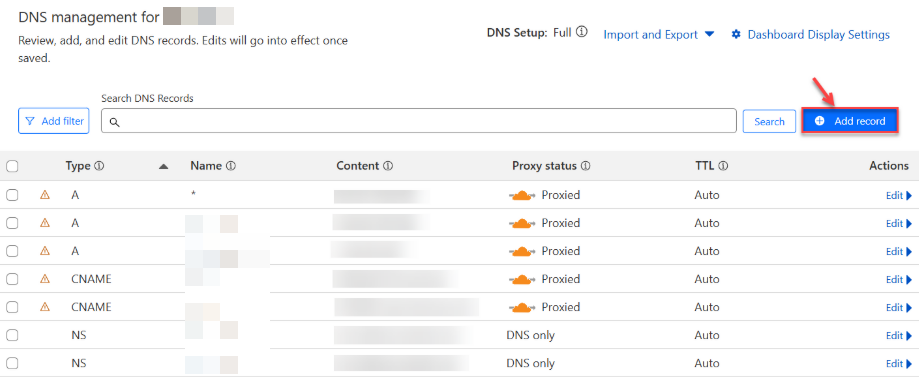
- Choose the record type and fill in the required fields (name, value, TTL, etc.).

- Click on “Add record.”
- To Edit an Existing Record:
- Click the “Edit” button next to the record you want to update.
- Make your changes and save.

Note: Some records can be set to Proxied (orange cloud icon). When proxied, the actual value is hidden (for example, in DNS lookups), providing extra privacy and protection.
In such a manner, you can add and edit DNS Records in Cloudflare. For such informative articles, visit our kb section regularly.
Expand your DNS skills! Check out How to update a DNS record in cPanel