This article describes how to grant a user all privileges in MySQL. The MySQL privilege system allows a user to make particular modifications to a database after they have been verified. A user can perform database actions such as INSERT, SELECT, DELETE and UPDATE, based on the abilities allowed in cPanel.
To give a user all privileges in MySQL, follow these steps:
- Log in to your cPanel account.
- From the Databases section, pick “MySQL® Databases”.

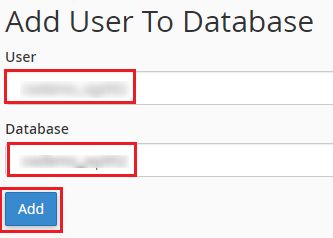
- Just go to the “Add User To Database” section under the MySQL Users section. Choose the User to whom you’d like to grant rights, as well as the Database to which you’d like to do so. Then, on the next screen, click the Add button.
- You’ll be taken to “Manage User Privileges”, where you can select the user’s privileges.
- To grant the user all privileges, check the ALL PRIVILEGES box and click the Make Changes button.

- The system will display a success message, indicating that the user’s selected privileges have been saved.

- Select Go Back at the bottom of the list.

- Later, you’ll return to MySQL® Databases. The Privileged Users column in the Current Databases table contains the user you just granted privileges to.

That’s it! Hope you have understood how to grant a user all privileges in MySQL using cPanel. For assistance contact our support team which is available just for you 24×7.
Also Read: How to Set Privileges to a MySQL user Account in cPanel