Email verification is essential to enhance performance and safeguard your domain against phishing and spoofing. To accomplish this, you must set up SPF, DKIM, and DMARC records for your domain.
Note: These entries might be configured by default if your domain is already using eukhost’s DNS.
Table of Contents:
What is SPF and How to Enable It on cPanel?
SPF (Sender Policy Framework) helps mail servers verify that emails from your domain are being sent by authorised servers. This prevents spammers from imitating your domain name.
Steps to enable SPF in cPanel:
- Log in to your cPanel account.
- Go to the ‘Email Deliverability’ option under the ‘Email’.

- Click on the ‘Manage’ button next to your domain.

- Scroll to the Sender Policy Framework (SPF) section.
- In the Record field, enter the SPF value. Example:v=spf1 a mx ~all.
- Handle Existing or Missing SPF Record:

What is DKIM and How to Enable It on cPanel?
DKIM (DomainKeys Identified Mail) ensures that your email content has not been changed during transit and confirms that it truly comes from your domain.
Steps to enable DKIM in cPanel:
- Log in to your cPanel account.
- Go to the ‘Email Deliverability’ option under the ‘Email’ section.

- Click on the ‘Manage’ button next to your domain.

- Scroll down to the DomainKeys Identified Mail (DKIM) section.
- Click ‘Install The Suggested Record’ to generate a DKIM key.
- Allow up to 24 hours for DNS propagation to complete.
Once enabled, your outgoing emails will include a DKIM signature that mail servers can verify.
What is DMARC, and how to enable it on cPanel?
DMARC (Domain-based Message Authentication, Reporting & Conformance) tells receiving servers how to handle emails that fail SPF or DKIM checks. It also provides reporting to track unauthorised email usage.
Steps to enable DMARC in cPanel:
- Log in to your cPanel account.
- Go to the ‘Zone Editor’ under the ‘Domains’.

- Click on the ‘Manage’ button next to your domain.

- Click ‘+ Add Record’.

- Enter the following:
- Name: _dmarc
- TTL: 600 (default)
- Type: TXT
- Value: v=DMARC1; p=none
-
Click ‘Save Record’.

- Allow up to 24 hours for DNS propagation to complete.
Once enabled, receiving servers can implement policies (none, quarantine, or reject) based on your DMARC settings.
Example Records:
Here are sample records you can customise:
- The SPF record can be written as:
v=spf1 include:spf.domain.com ~all
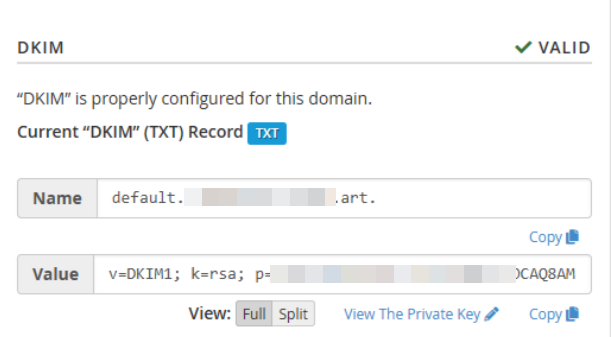
- The DKIM record is usually generated automatically in cPanel, and it looks like:
default._domainkey IN TXT “v=DKIM1; k=rsa; p=MIIBIjANBgkqh…”
- A basic DMARC record example is:
_dmarc IN TXT “v=DMARC1; p=none”
- An advanced DMARC record example is:
_dmarc.example.com IN TXT 14400 “v=DMARC1; p=quarantine;
pct=100; rua=mailto:[email protected]”
Best Practice
- TTL values may vary if your DNS is hosted externally.
- For production servers, use stricter DMARC policies such as:
- v=DMARC1; p=quarantine; rua=mailto:[email protected]
- v=DMARC1; p=reject; rua=mailto:[email protected]
- When using advanced DMARC policies (quarantine or reject), ensure that DMARC reports are delivered to a monitored mailbox to avoid email delivery issues.
By following these steps, you can successfully add SPF, DKIM, and DMARC records for your domain. This improves email security, prevents spoofing, and ensures better email deliverability to your recipients’ inboxes.
For a detailed SPF setup in cPanel, Learn How to create a Basic SPF Record in cPanel.