This tutorial will explain to you how to scan directories for malware in Imunify360. Infected files are automatically cleaned with Imunify360’s Linux Malware Scanner for servers. Additionally, its dashboard allows users to keep track of all incidents in one place.
Follow the steps to scan directories for malware in Imunify360:
- Log in to Imunify360.

- Select the “Malware Scanner” feature.

- Click on the “Scan” option from the available options.
- Enter the name of the folder in the “Folder To Scan” option.
- Click on the “Advanced” settings option to use it.
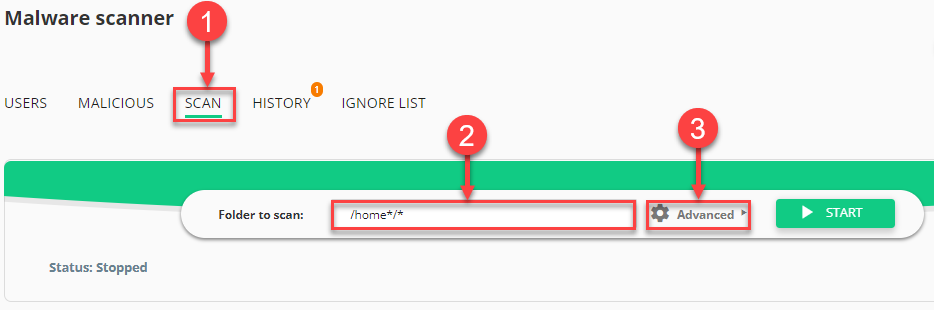
- Click on the “Advanced” option. New options will emerge.
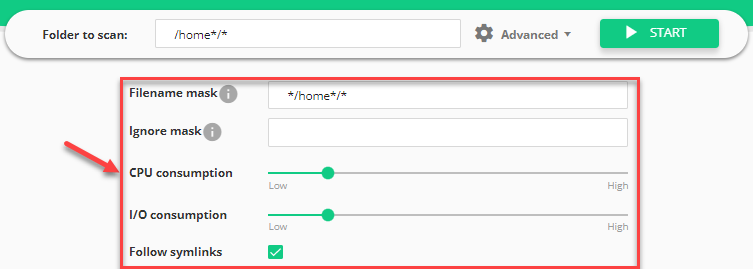
Fill up them:- Filename Mask: It lets you specify the category of a file to be scanned (for instance, *.php for all files with the PHP suffix). The default setting is *, which means that all files are allowed.
- Ignore Mask: It lets you specify certain file types to ignore (for instance, *.html ignores all files with the HTML extension).
- CPU Consumption: * Defines the CPU utilisation for scanning without reducing efficiency from low to high.
- I/O consumption: The I/O utilisation for scanning is defined, with a range of Low to High.
- Follow Symlinks: Track all symlinks within the folder to scan.
NOTE: LVE is used to control scan intensity while Imunify360 is running on the CloudLinux OS. The CPU is controlled by “nice” when it is running on another operating system, and “ionice” when the I/O scheduler is CFQ.
- Click on the “Start” button.

- It will start “Scanning” on the top right side of the screen.
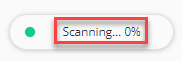
- After scanning you will find the scanning “status” just below it as shown in the image given below.

You can use Imunify360 to scan the folders in this manner. The eukhost support team is the best place to turn for any issues. They are always willing to assist you.