
This guide discovers the process of setting Let’s Encrypt (LE) as your server’s default AutoSSL provider.
Let’s Encrypt is a widely used and rapidly growing certificate authority that provides free SSL certificates. By default, it’s not installed on cPanel/WHM servers, but you can easily set it up as the default AutoSSL provider by following these steps:
Steps to Install and Enable Let’s Encrypt:
- Log in to WHM.
- In the search bar on the left, enter “AutoSSL.” In the SSL/TLS area, select Manage AutoSSL.

- Click the “Let’s Encrypt” radio button. Examine the terms and conditions of Let’s Encrypt. Click Save after checking the box next to “I agree to these terms of service” if you want to keep using Let’s Encrypt.
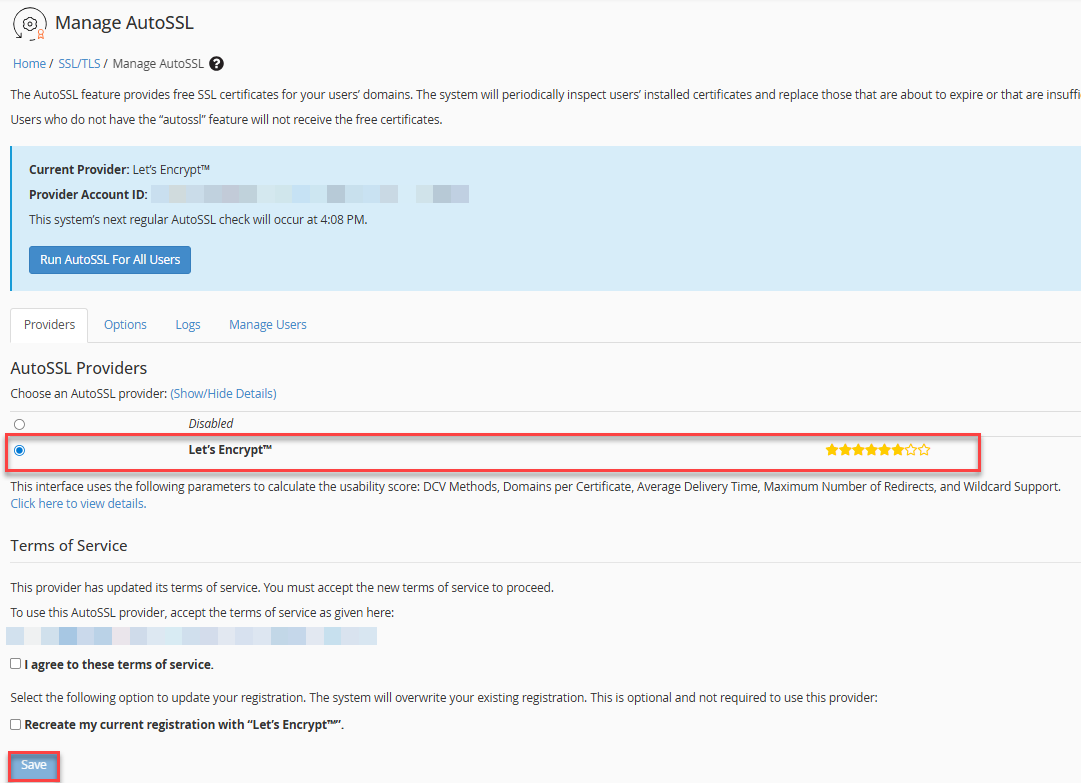
- Let’s Encrypt is now ready for you to use. Select the Manage Users tab. You may control the SSL settings for each domain here.
- Click the radio button next to Enable AutoSSL for each account you want to use with Let’s Encrypt. SSLs will be installed and updated automatically.
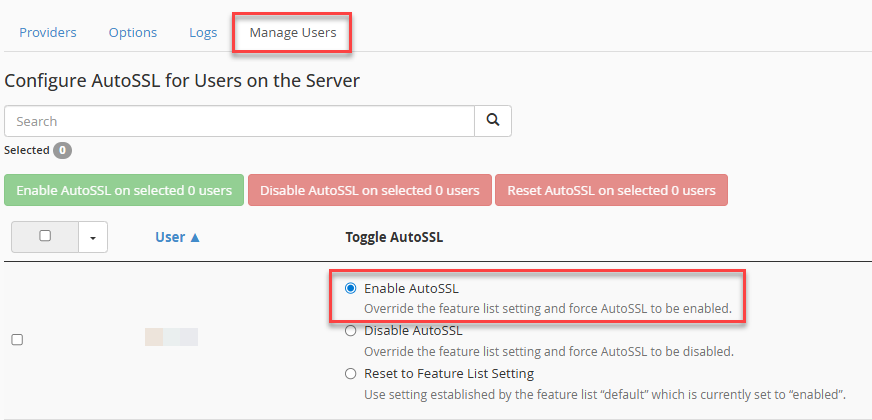
Your server is now set to issue SSL certificates from Let’s Encrypt automatically for all eligible domains!