This tutorial shows you how to add new MX Records in cPanel.
Create an MX Record in cPanel: A Step-by-Step Guide
Create an MX record for your domain by following these steps.
1. Log in to your cPanel account.
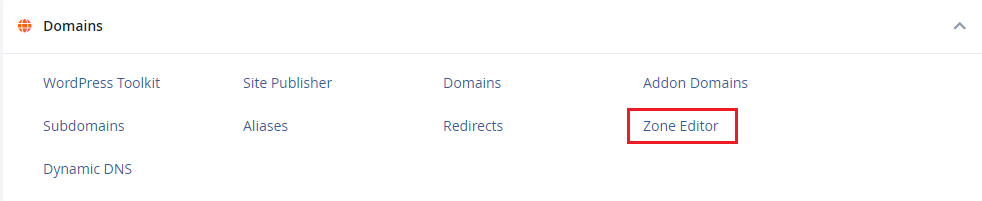
2. Go to Domains
On the cPanel dashboard, navigate to Domains and click Zone Editor
3. Add a New MX Record
Under Add a New Record, fill in these parameters correctly:

- Name: This is where you’ll put your domain name.
- TTL stands for time to live and indicates how long the MX record should be kept in the cache in seconds. If you’re not sure what number to use, we suggest leaving the default value at 14400.
- Type: For the DNS record type, click the drop-down arrow and choose “MX.”
Value: Set the MX record to link to your chosen email server address.
After that, just press the Add Record button to store the new MX record, and you’re done.
If you have any problems updating or generating MX records, please contact Webhosting UK (WHUK) staff who will assist you through the process.