This guide provides step-by-step instructions for updating MX records using cPanel and WHM.
MX (Mail Exchange) records are a critical component of DNS settings, determining the mail server responsible for receiving emails for your domain. While you may not frequently need to modify MX records, such changes are essential when switching servers or configuring email services.
Steps to Change MX Records in cPanel:
- Verify Nameservers:
- Use an online DNS checker tool to identify your current DNS records and ensure they point to the correct nameservers.
- Verify that you have access to modify DNS settings for your domain.
- Modify the TTL Settings:
- Locate the TTL (Time to Live) setting for your domain in the DNS Zone Editor of cPanel.
- Lower the TTL value (e.g., to 300 seconds) to ensure quicker propagation of changes.
- After verifying that changes have propagated correctly, restore the TTL to its original value.
Note: TTL adjustments should be made 24–48 hours before modifying MX records to avoid delays.
- Update the MX Records:
- Log in to cPanel.
- Navigate to Zone Editor under the Domains section.

- Select Manage for the domain you wish to update.

- Look for existing MX records and edit or add new ones:
- Specify the priority value (lower values indicate higher priority).
- Enter the mail server’s hostname or IP address.
- Save the changes.

How to Change MX Records Using WHM
If you are managing a VPS, Cloud Server, or Dedicated Server, you can modify MX records through WHM.
Steps:
- Log in to WHM.
- Navigate to DNS Functions > Edit DNS Zone.

- Select the domain and click Edit.
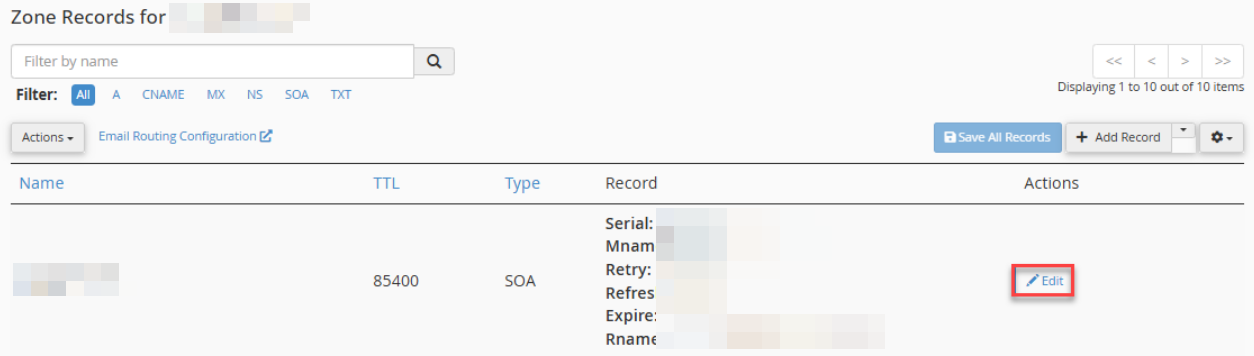
- Locate the MX record fields and:
- Update the priority and mail server details.
- Ensure the domain’s A record resolves to the correct mail server IP.
- Save the changes.

Additional Notes:
- Ensure the MX record points to a valid mail server name or IP address.
- The propagation of DNS changes can take up to 24–48 hours, depending on your TTL settings.
- For live assistance, contact your hosting provider via Live Chat or raise a ticket in your client area.
Troubleshooting Tips:
- Verify your DNS changes with tools like MXToolbox or whatsmydns.net.
- Double-check the mail server hostname for typos or configuration errors.
- Ensure proper reverse DNS (PTR) records are configured for the mail server IP to avoid email deliverability issues.
In such a manner, you can change MX records using cPanel or WHM. If you require additional support, feel free to contact our support staff.