Securing your WordPress website is crucial for protecting your data, users, and online presence. One of the most effective ways to enhance security is by enabling Two-Factor Authentication (2FA). This adds a verification step beyond the standard username and password.
This guide ensures you implement 2FA correctly and safely on self-hosted WordPress (WordPress.org) websites.
Table of Contents
Why Two-Factor Authentication Matters?
Even strong passwords can be compromised through phishing, brute-force, or credential stuffing attacks. 2FA helps prevent unauthorised logins by requiring a one-time code from an authenticator app.
Websites using 2FA benefit from:
Choose a Trusted 2FA Plugin
WordPress does not include built-in 2FA by default. You must install a reliable plugin. Popular and trusted options include:
- Wordfence Security – Includes built-in 2FA and strong login security tools.
- Google Authenticator (by miniOrange or other verified developers) – Simple authentication setup.
- WP 2FA – Dedicated 2FA plugin with enforcement options.
- Two-Factor (by Plugin Contributors) – Lightweight and free.
Note:
- Wordfence is not an authenticator app; it merely provides 2FA functionality.
- Loginizer does not support Google Authenticator. It helps with brute-force protection only.
Install plugin
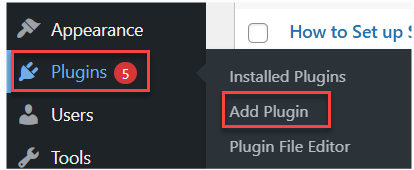
- Go to ‘Plugins’ in your WordPress dashboard.
- Click on ‘Add Plugin’.
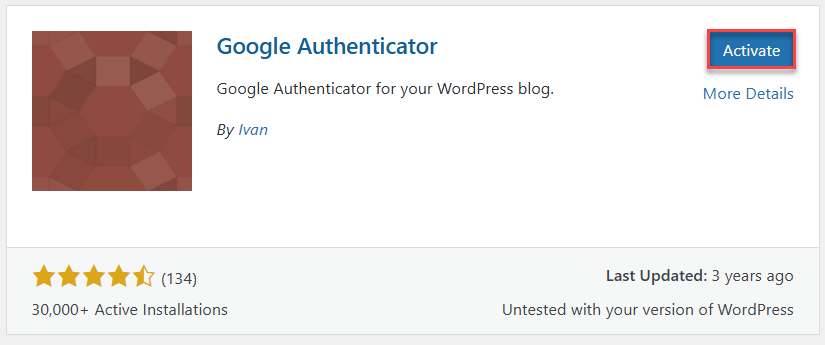
- Use the search bar to find the plugin you want.

- Click ‘Install Now’ on the plugin.

- Click ‘Activate’ to start using the plugin.
- Always use plugins from reputable sources to keep your site secure.
Configure Plugin Settings (Google Authenticator Example)
If you are using the Google Authenticator plugin, you can manage how 2FA behaves for your site.
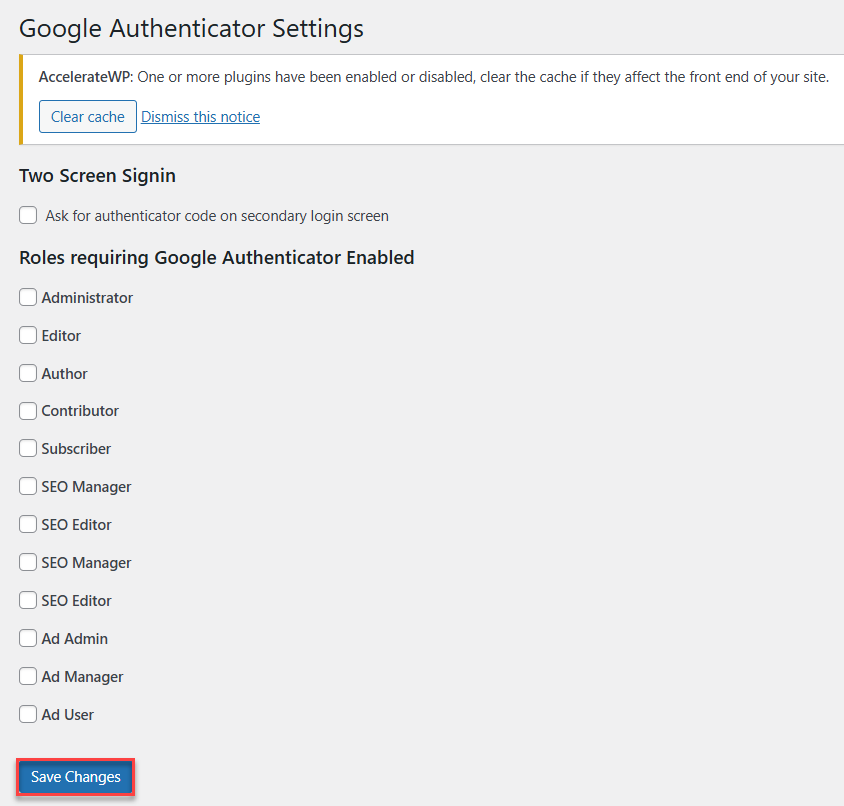
- Two-Screen Sign-In:
Tick this box if you want WordPress to ask for the authenticator code on a second login screen. This adds an extra layer of security during login. - Roles Requiring Google Authenticator Enabled:
Here, you can choose which user roles must use 2FA. Options include: Administrator, Editor, Author, Contributor, Subscriber, SEO roles, and Ad roles. Simply check the boxes for the roles you want to enforce 2FA on. - After selecting your preferred options, click the ‘Save Changes’ button at the bottom to apply the settings.
User 2FA Setup
Users belonging to enforced roles must set up 2FA when they next log in.
They will see a prompt requiring them to:
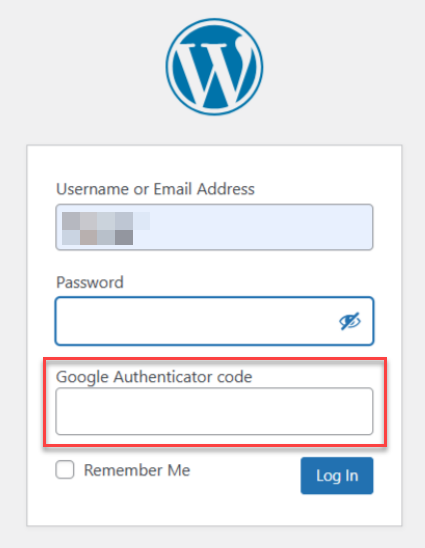
- Log in to WordPress with their username and password.
- They will be prompted to link their account with an authenticator app.
- Scan the QR code displayed on-screen.
- Enter the 6-digit code generated by the app.
Compatible authenticator apps include:
- Google Authenticator
- Microsoft Authenticator
- Authy
- 1Password / LastPass Authenticator
Best Practices
- Use TOTP authenticator apps, not SMS (which is less secure).
- Ensure all Administrators enable 2FA before enforcing it sitewide.
- Keep your WordPress core, themes, and plugins updated.
- Generate and store backup codes in a safe location.
In this way, enabling 2FA becomes an easy yet highly effective method to secure your WordPress login and prevent unauthorised access. If you need help at any step, feel free to contact our support team.
Strengthen your server security as well – check out How to enable two-factor authentication (2FA) in WHM
A Managed WordPress Hosting solution helps protect your website with advanced security features, automated updates and expert WordPress management tools.