
Improving your WordPress website speed is essential for better user experience, SEO, and Core Web Vitals. One of the easiest ways to boost performance is by using caching plugins like W3 Total Cache (W3TC).
This guide will show you how to install and activate W3 Total Cache to optimise your site.
Steps to Install and Activate W3 Total Cache:
- Log in to your WordPress.

- Click on “Plugins”.
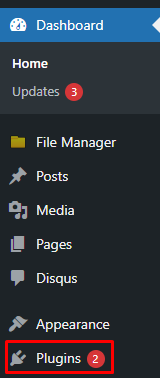
- Select the “Add New Plugin” option.

- Enter “W3 Total Cache” in the Search Results to find the plugin.

- Click on “Install Now”.
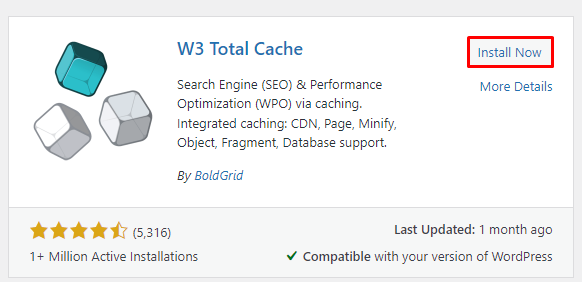
Note: Before installing W3 Total Cache (W3TC), here’s what it does: W3TC optimises WordPress websites to boost speed, SEO, and user experience. It reduces load times with page caching, CSS/JS/HTML minification, lazy loading, browser caching, and CDN support. Compatible with most hosting environments, it improves performance without affecting your theme, plugins, or content workflow and has been trusted globally for over a decade. - Click on the “Activate” button.
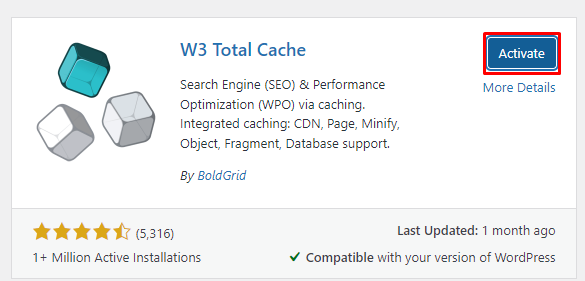
- Now you can observe that the “W3 Total Cache” plugin has been successfully installed.

In this way, you can install and activate the W3 Total Cache plugin on your WordPress. For more information on WordPress, visit our knowledge base section.