For security reasons, sending e-mail using the internal PHP mail() function is disabled on most of our shared servers. Default WordPress installations rely on the mail() function to send e-mail to you and your blog users. You will need to switch over to using SMTP authentication for e-mails to work.
As there are no settings in the WordPress Admin Area that allow you to switch to SMTP for sending e-mail, you will need to install a plugin to accomplish this. There are many plugins to choose from; but it is important to choose one that is compatible with your version of WordPress, has good user ratings, and is trustworthy.
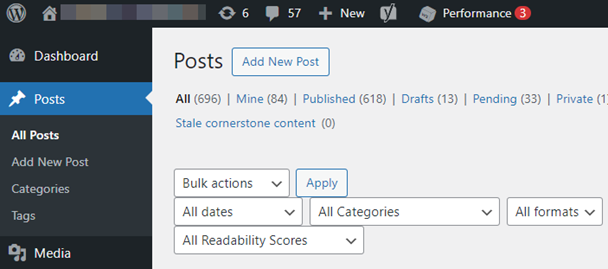
How to find out what version of WordPress is running?
In your WordPress Admin Area, the current version you have installed is mentioned at the bottom-right of each page. You can also find your installed WordPress version by going to the Dashboard and expanding the “At a Glance” box.
Follow the steps:
- Install an SMTP plugin-
- Log in to your WordPress Admin Area.
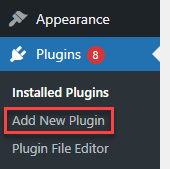
- Go to Plugins > Add New.
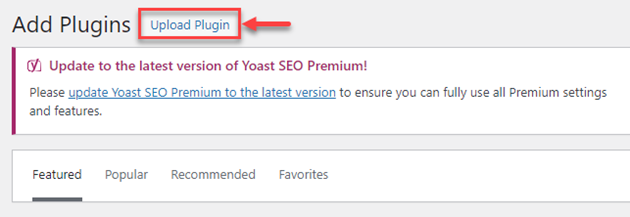
- At the top of the page, click the “Upload Plugin” button.
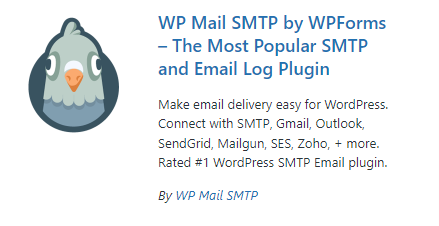
- Search the plugin using the search tool as shown in the image given below.

- You will find the plugin as shown below.
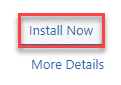
- Click on the “Install Now” button.
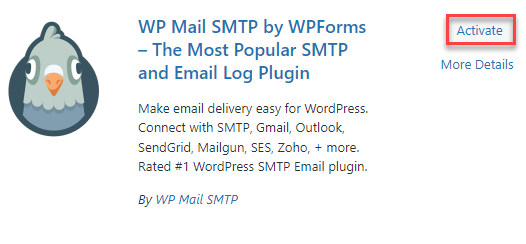
- Finally, click on “Activate”.
- Log in to your WordPress Admin Area.
- Configure WP Mail SMTP-
The following steps are for the WP Mail SMTP plugin by Callum Macdonald. If you’re using a different plugin, the steps might be similar, but it is advised to refer to the documentation or guide specific to your chosen plugin.
Follow steps-- Go to “Settings” > “Email” (or “WP Mail SMTP” if there’s a separate menu option).
- You will see various options to configure SMTP settings.
- In the From Email field, type in the e-mail address you have set up or want to use for WordPress e-mails. Leave all other options as they are unless you know you need to change them.
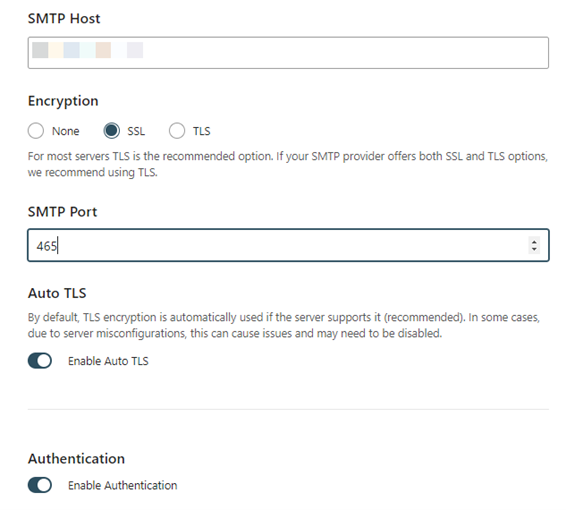
- For Authentication (near the bottom), select “Yes: Use SMTP authentication.” then enter your e-mail address and password in the Username and Password fields.
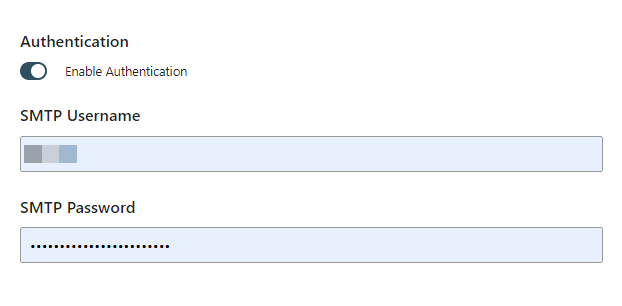
Note- Some common SMTP servers include Gmail (smtp.gmail.com), Outlook (smtp.office365.com), and SendGrid (smtp.sendgrid.net). Be sure to check your provider’s documentation for the correct settings. - Finally, click “Save Changes”.
- Test your email configuration to ensure everything is working properly using the Send a Test Email form at the bottom of the same page.
This way, you can switch to sending email via SMTP. However, if you face any challenges, seek assistance from our support team. For more informative KBs, you can visit our KB section.