
AutoSSL in WHM automatically issues and renews SSL certificates for cPanel accounts. This guide explains how to enable or disable AutoSSL for specific users, giving administrators greater control over SSL management on the server.
Let us follow the steps given below:
- Log in to WHM.
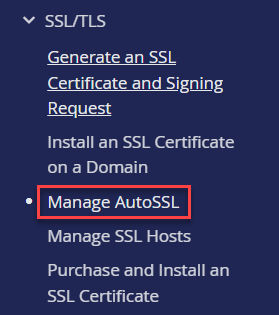
- Select the SSL/TLS option from the left side of the screen and click on the Manage AutoSSL.
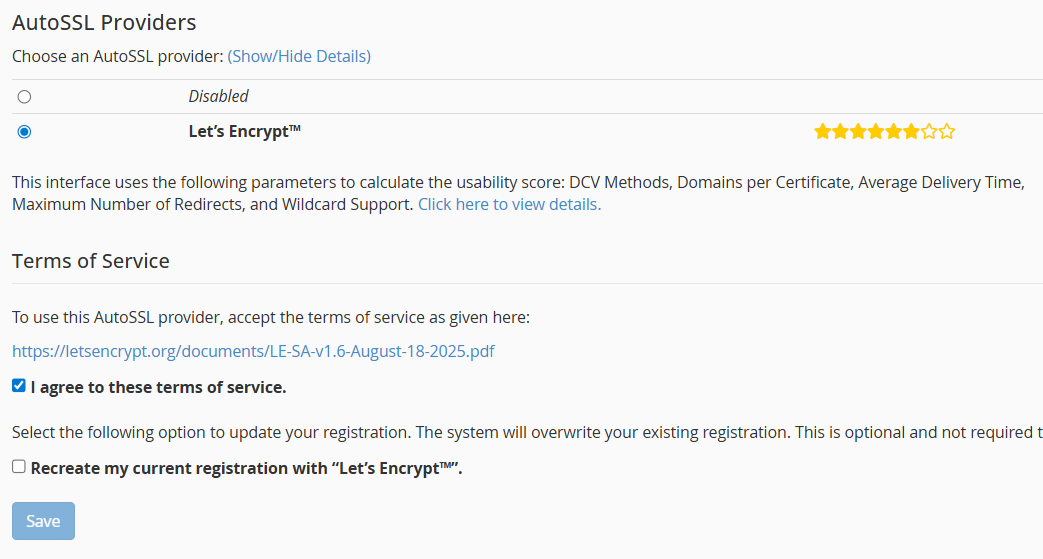
- Scroll down until you find the Providers tab. Under this option, you can select the AutoSSL Provider and click the Save button.
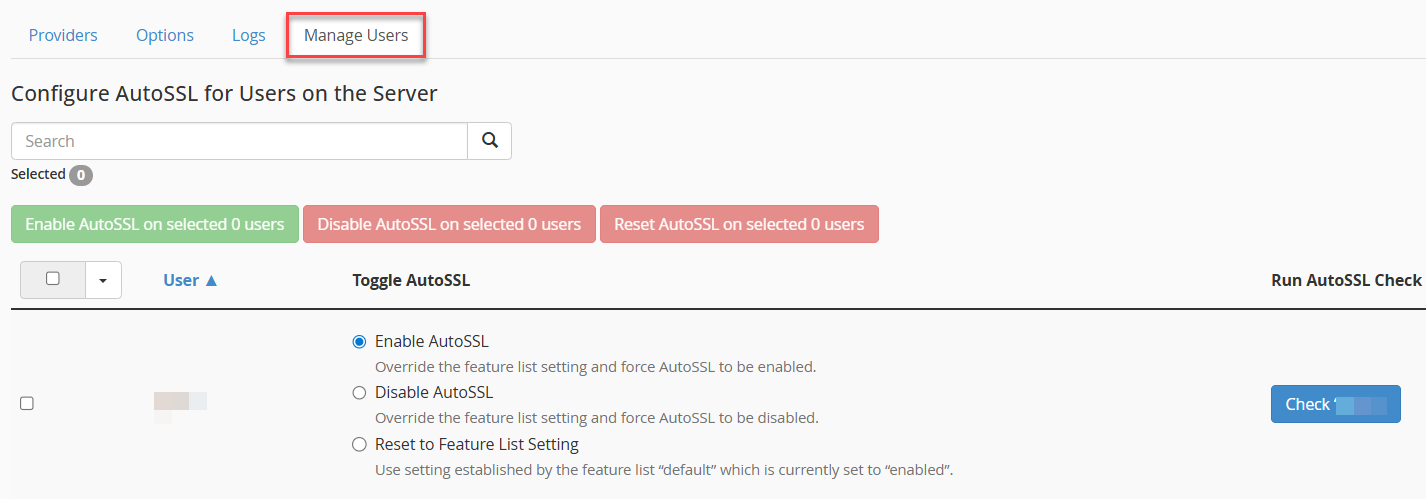
- Now, select the Manage Users tab.
- Each user account on your server’s AutoSSL configuration settings is included.
- Select the wanted user account and then select the AutoSSL setting.
- The three available settings are “Enable AutoSSL”, “Disable AutoSSL”, and “Reset to Feature List Setting”.
This way, you can easily enable or disable AutoSSL for specific users in WHM. If you require further assistance or encounter any issues, please don’t hesitate to contact our support team, which is available 24/7 to assist you.