IP forwarding is the ability for an operating system to accept incoming network packets on one interface, identifying that it is not meant for the system itself, but it should be forwarded on to another network, and then onwards accordingly.
By default, any latest Linux distributions will have IP Forwarding disabled. Thus, it is a good idea, as many users will not need IP Forwarding, but, What if we are setting up a Linux router/gateway or a VPN server or simply a plain dial-in server then we must need to enable forwarding.
IP Forwarding Overview
In this tutorial we will see how to enable IP forwarding on Linux, it is a fairly simple procedure and we will learn how to make this temporary or permanent on the system.
IP forwarding enables an operating system (here on Linux) to forward packets as a router does or more generally to route them through other networks.
The activation of IP forwarding is often used when listening to the network (Man in the middle attack in particular) but also more simply when trying to make a Linux machine a router between several networks.
Let’s check out how to Enable IP Forwarding:
Firstly, we need to check the Current IP forwarding status.
Check if IP Forwarding is enabled or not:
Here we have to query the sysctl kernel value net.ipv4.ip_forward to check if IP forwarding is enabled or not: Using sysctl:
sysctl net.ipv4.ip_forward
net.ipv4.ip_forward = 0
Or just check out the value in the /proc system:
cat /proc/sys/net/ipv4/ip_forward
0

As per the above examples, we can see this was disabled (as shown by the value 0).
Temporary Activation
The activation and deactivation of IP forwarding, in IPv4, as does IPv6 is handled in /proc files. This is “/proc/sys/net/ipv4/ip_forward” for IPv4 and “/proc/sys/net/ipv6/conf/all/forwarding” for IPv6.
If we do a “cat” on these files, we will see that they are by default to 0, to activate the IP forwarding temporarily, it is enough to put them at 1. One can then modify the file or use the “sysctl” command:
| sysctl -w net.ipv4.ip_forward=1

Or, following is one more command to enable temporary:
| echo 1 > /proc/sys/net/ipv4/ip_forward
The temporary change, of course, means that the parameters will return to their default value when the machine restarts or “sysctl” restarts if it is done manually.
Now, let’s check out the Permanent Solution for it.
Permanent Activation
To enable these changes permanently, you have to modify the configuration file of sysctl so that it loads our modifications each start. It is the file “/etc/sysctl.conf” to activate IPv4 IP forwarding. We will add or uncomment this line:
| net.ipv4.ip_forward = 1
For IPv6, we will do the same with this line:
| net.ipv6.conf.all.forwarding=1
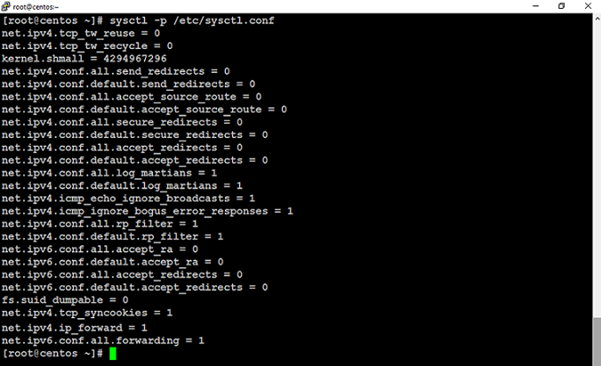
The configuration can then be reloaded so that the changes take effect immediately:
| sysctl -p /etc/sysctl.conf
That’s it! You have successfully performed the activation.
For reliable and affordable cPanel web hosting plans, please visit eukhost and initiate a live chat.