This article explains how to enable your WordPress SSL.
Let us follow the steps:
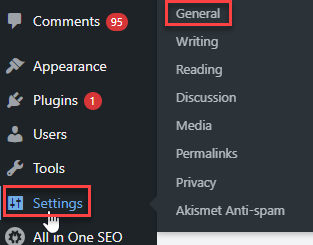
- Log in to WordPress.
- From the left-hand side of the screen, select the “Settings” option and click on “General”.
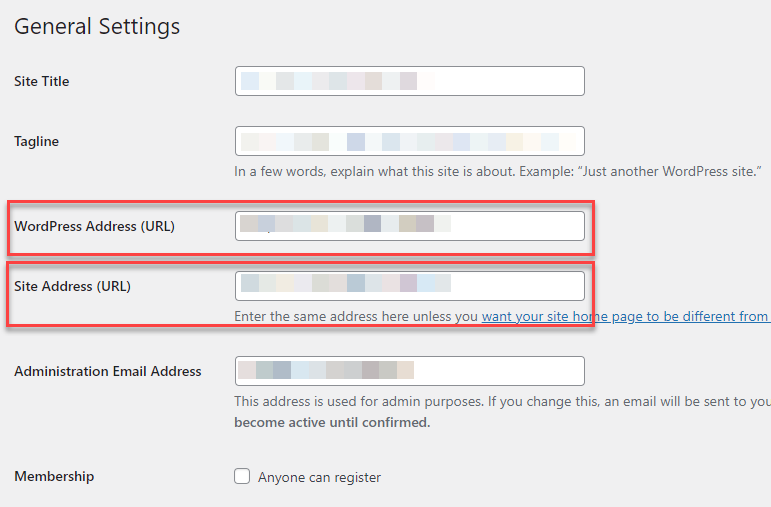
- You will enter the general settings page. Enter the https address in the “WordPress Address (URL) field.
- Now, enter your https address in the Site Address (URL) field. According to WordPress guidance, input your desired address in this field if you intend to have your site’s homepage distinct from the directory where WordPress is installed.
- Scroll down and click on the “Save Changes” button.
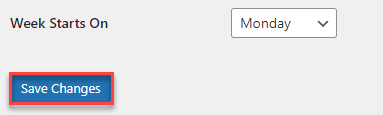
- You will receive a success message.
This way you can enable your WordPress SSL. For more informative articles, visit our KB section regularly.