The community of programmers are grouped together to create an easy to install and ready made blog with thousands of themes and they developed WordPress as a free open source blogging platform for web masters and bloggers. WordPress is designed in PHP with MySQL Database support to store data. It is well known for its ease of installation. Under most circumstances installing WordPress is a very simple process and takes less than five minutes to complete. Many web hosts now offer tools like Fantastico to automatically install WordPress from control panel like cPanel hosting. However, if you wish to install WordPress yourself, the following steps will help you assuming you already have a domain name and web hosting account.
Installation of WordPress is very simple and easy. While this is a manual process it requires a bit of computer knowledge and normally takes small amount of time. There are some tools that automatically help you set up your blog in no time without you have to enter many details. Before proceeding with your installation, you need access to your site and its directory and software to proceed with the installation. Which includes Access to your web server via shell or FTP, Requires a text editor, FTP Client and a web browser of choice.
- Before downloading the latest version of WordPress from its official site please check to ensure that you and your web host have the minimum requirements to run WordPress.
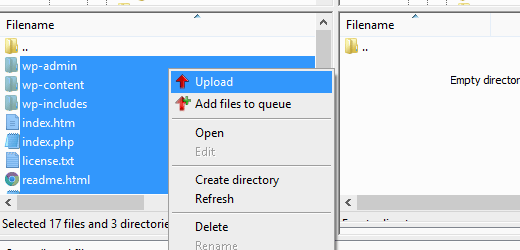
- Once you have completed with the checking of requirements Unzip the downloaded file to a folder on your hard drive and use the FTP software to upload the files into your chosen web host directory.
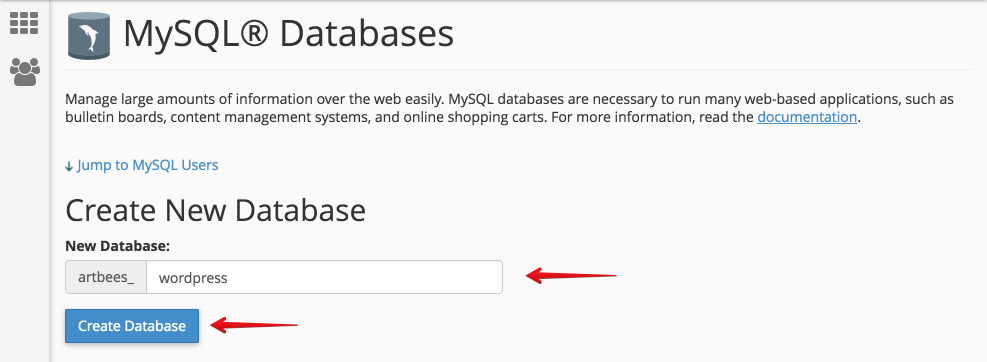
- After uploading WordPress create a database for WordPress on your web server as well as a MySQL user who has all privileges for accessing and modifying it. Give a name to your database and click on Create Database.
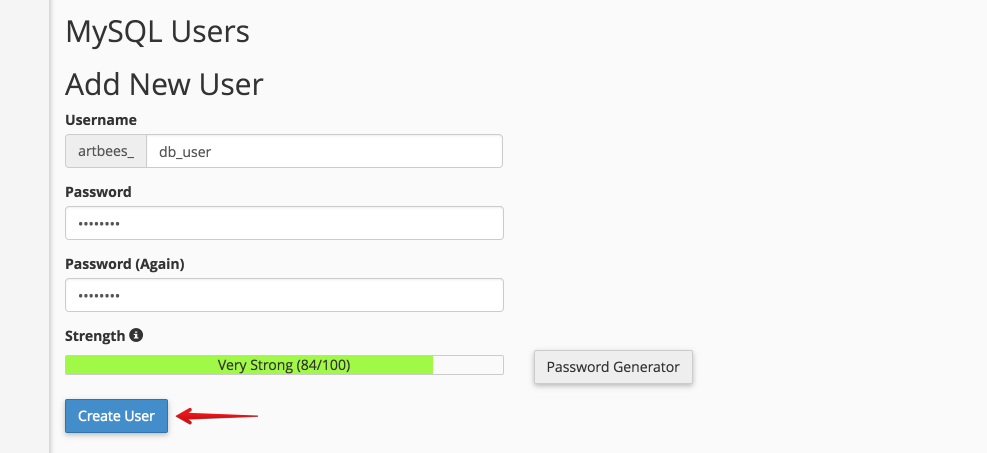
- Next head to MySQL Databases page in your cPanel account, scroll down to MySQL Users section and give the username and password for your new user and click on Create a User button.
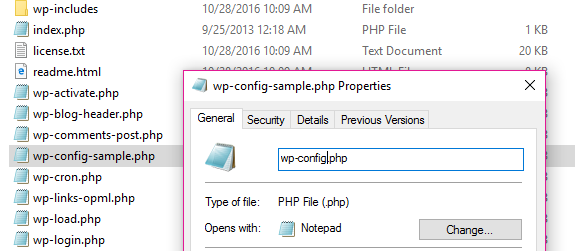
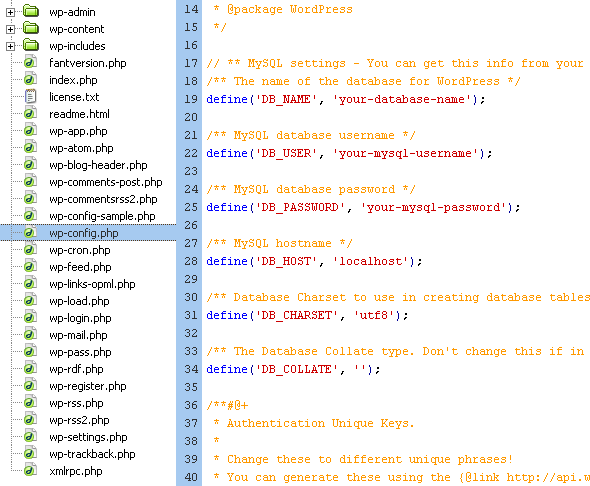
- Rename the wp-config-sample.php file to wp-config.php.
- Now open wp-config.php in a text editor and fill in the database information under the section named –
// ** MySQL settings - You can get this info from your web host ** //
DB_NAME
The name of the database you created for WordPress.
DB_USER
The username you created for WordPress.
DB_PASSWORD
The password you chose for the WordPress username.
DB_HOST
The hostname (usually localhost, but not always; see some possible DB_HOST values). If a port, socket, or pipe is necessary, append a colon (:) and then the relevant information to the hostname.
DB_CHARSET
The database character set, normally should not be changed.
DB_COLLATE
The database collation should normally be left blank.
- Enter your secret key values under the section labeled
* Authentication Unique Keys.
- Save the wp-config.php file.
- Upload all your WordPress files in the desired location on your web server.
- Now Run the WordPress installation script by accessing wp-admin/install.php in a web browser to ensure that it is working or not.
eUKhost hosting services offers affordable and secure cPanel hosting packages with features to install WordPress with quality support and services.
