The following guidelines undertake that your WordPress database table prefix is set to “wp_”. If you work with something different table prefix, then change your code accordingly. For example, if you are using “wpsqltable_” in spite of “wp_”, after this the code “INSERT INTO `wp_users`” would change to “INSERT INTO ` wpsqltable_users`”.
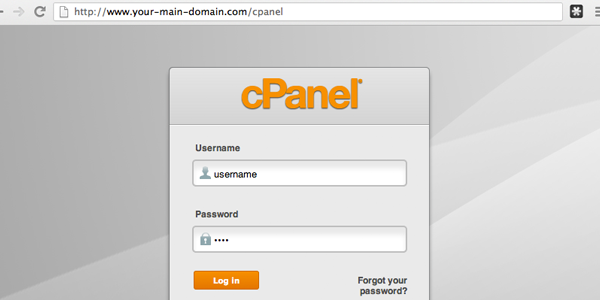
Step 1: Log in to your cPanel account.

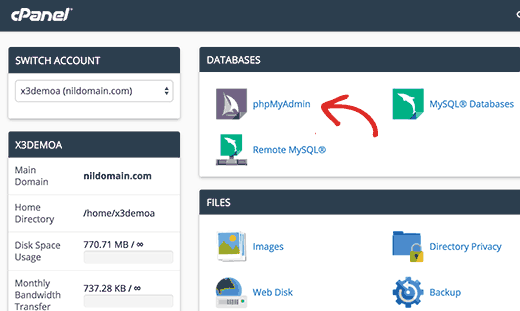
Step 2: From the main cPanel interface, find the Databases section and click on the icon entitled phpMyAdmin.

Step 3: When the first screen appears, see at the left hand sidebar and click on the database for your particular WordPress installation.

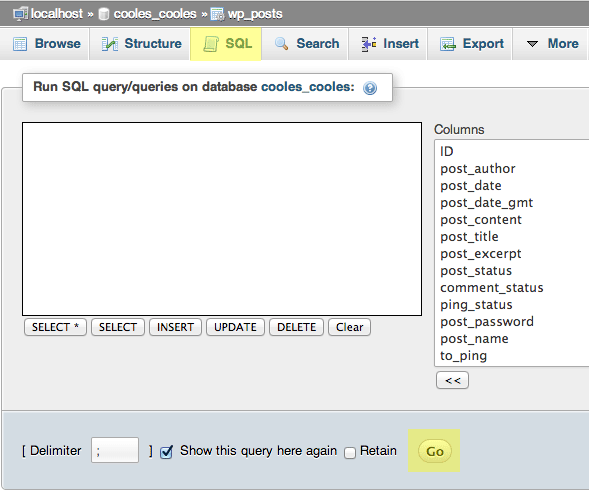
Step 4: After the database information is loaded, you can find the tab named SQL and click on it.

Step 5: Following is the code to add a new admin account in the SQL editor named newadmin with the password pass_abc. You can change any of the content in red to fit your requirements, but leave all other data as it is.
INSERT INTO `wp_users` (`user_login`, `user_pass`, `user_nicename`, `user_email`, `user_status`)
VALUES ('newadmin', MD5('password'), 'name', '[email protected]', '0');
INSERT INTO `wp_usermeta` (`umeta_id`, `user_id`, `meta_key`, `meta_value`)

VALUES (NULL, (Select max(id) FROM wp_users), 'wp_capabilities', 'a:1:{s:13:"administrator";s:1:"1";}');
INSERT INTO `wp_usermeta` (`umeta_id`, `user_id`, `meta_key`, `meta_value`)

VALUES (NULL, (Select max(id) FROM wp_users), 'wp_user_level', '10');
Step 6: After replacing any data fields as per your requirement, click the Go button to execute the code.

Step 7: After the above step the screen is refreshed and you can see the message ‘1 row affected‘ after each of the three SQL statements. This means the query has run successfully. From here, visit your WordPress admin login panel as usual and utilize the new admin login information. You will be directed to admin interface without any trouble.
