
In this guide, we have explained how to change the DNS server on Windows Server.
Follow the steps to alter the DNS server on Windows Server:
- Open Windows by click on the windows icon on your computer.

- Click on the “Settings” button.

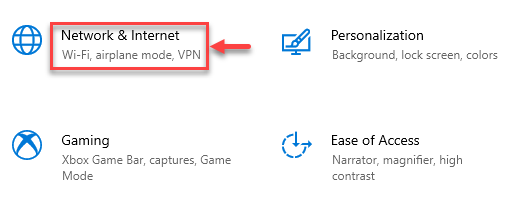
- Click on the “Network & Internet” option.
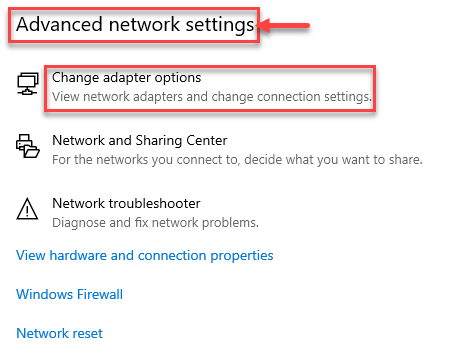
- Now, click on the “Change adapter options” option under “advanced network settings”.
- Select the connection you wish to modify the DNS server for with the right click. Choose that if you are connected via Wi-Fi. Choose that if your connection is Ethernet. The connections that are in use will have green bars, whilst the connections that are not will have a red X, letting you know which ones you are currently using.
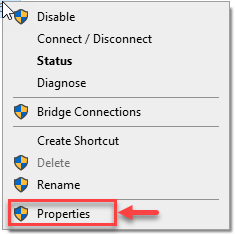
- Right click on the connection and click on the “Properties” option as shown in the image given below.
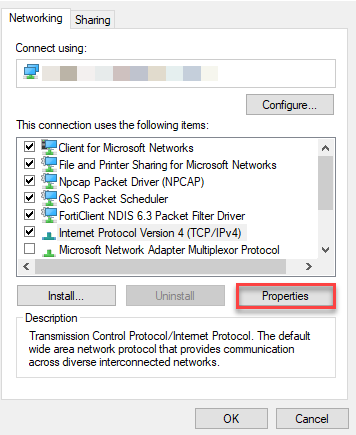
- Select “Internet Protocol Version 4 (TCP/IPv4)” option.
- Select “Properties” button.
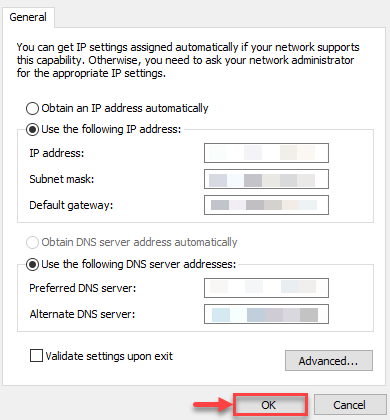
- Enter the IP address for the Preferred DNS serverand for the Alternate DNS server.
- Finally, click on the “Ok” button to make the changes.
This way, you may change the DNS Server on Windows Server. For more such informative articles, do visit our KB section and never hesitate to seek help from our customer support team.