In this article, you will understand how to set up and access additional web disk accounts in cPanel. Setting up a Web Disk account enables you or another user to easily navigate, upload and download files between a computer and your web server. Using its drag-and-drop interface, users can access the website’s files as if they were stored on a local computer drive.
To set up an additional web disk account, follow steps:
- Log in to your cPanel account.
- Scroll to the Files section.
- Click on Web Disk.

- Under Create an Additional Web Disk Account, type the username you want to use in the Username textbox.

- In the Password text box, type the password. To create a strong password automatically, click the Password Generator button.
- Retype the password in the Password (Again) box.
- cPanel automatically fills in the user’s Web Disk directory in the Directory box. This is based on the username you typed in earlier.
- The default permission of the Web Disk directory is for full Read-Write access. If you are creating an account for another user for whom you do not wish to have full privileges, click on ‘read-only’.
- You must enable Digest Authentication if you use Windows versions Vista, 7, 8, or 10 and you are accessing Web Disk over a clear text, unencrypted connection.
You do not need to enable Digest Authentication if the domain has a recognised, signed SSL certificate or if you are able to connect to Web Disk with SSL over port 2078. - Click Create to complete the account setup process.
To access your web disk account, follow the steps:
Once you click the create button, a new page will open.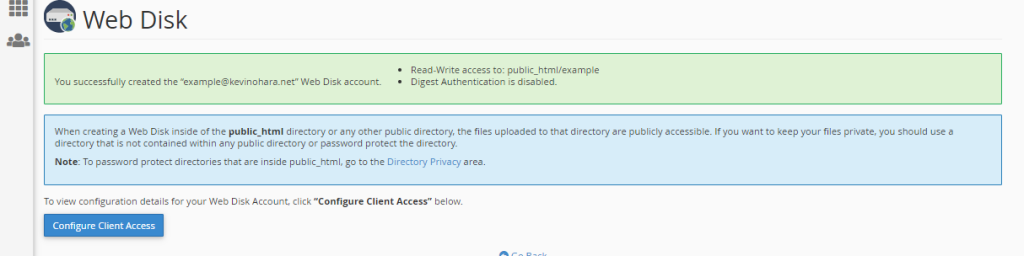
- Click the Configure Client Access button.
- Choose your computer or device operating system from the choices given.
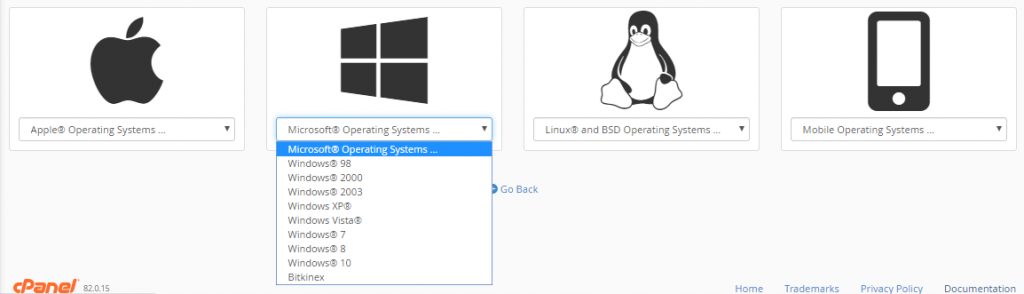
- Once you have made your choice, a Download Configuration Script button will appear. Click on this to download the VBS script to your computer.
- The file will be saved to your Downloads folder. You can move it to somewhere more appropriate, if required, or even drag it to the desktop for frequent use.
- To access Web Disk, click on the “business.eukhosting.net Secure WebDisk file.”

- When the dialog box appears, click Open.
- A File Explorer page will automatically open. You will need to log in using the username and password you used to create the Web Disk account.
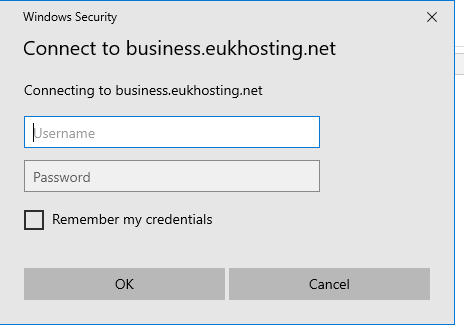
- Fill in the username and password details and click OK.
- Once you have logged in, your Web Disk will appear. You can upload or download files between your device and server simply by dragging and dropping.
In cPanel, you may quickly create and access additional web disk accounts this way. More helpful KBs can be found in our Knowledge Base section. If you have any problems, please contact our support team.