This tutorial explains how to utilise the cPanel Plugin File Generator in WHM. Plugins allow you to integrate your applications or third-party sites with the cPanel interface by adding links. The cPanel interface’s theme generates a plugin installation file for this purpose. This file automates the plugin installation process and stores the necessary plugin settings as an a.tar.gz file in the /var/cpanel/cpanel_plugin_generator/ directory.
Let us follow the simple steps:
- Log in to WHM.
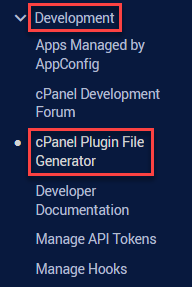
- Click on the “cPanel Plugin File Generator” under “Development” section.

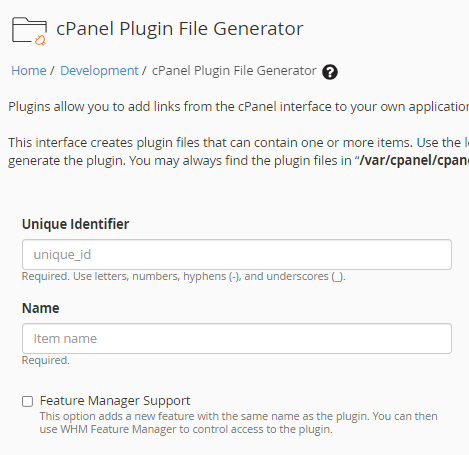
- You will head towards a new page consisting of a form. Fill out the details as mentioned below-
- Unique Identifier- Enter the “Unique Identifier”. You may utilise letters, numbers, hyphens (-), and underscores (_).
- Name- Enter the name.
- Feature Manager Support- Tick the check box.

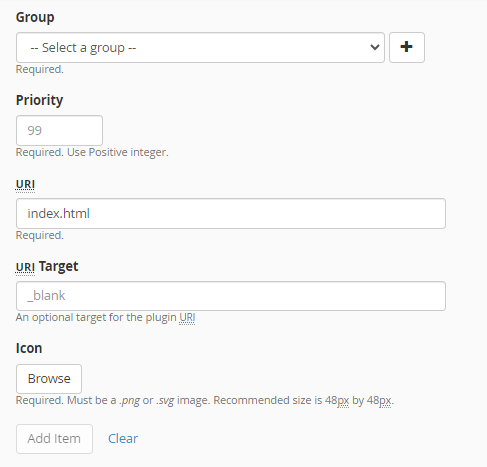
- Group- Choose the group using the drop-down menu.
- Priority- Enter the priority. It must be between 1-99. Use a positive integer.
- URI- Input the plugin’s location into the URI text box.
- URI Target- Input the URI target.
- Icon- Add the icon file using the “Browse” button. It must be in SVG or PNG format and the required size must be 48px by 48px.
- Lastly, click on the “Add item” button.

- If you need to add another item to the plugin installation file, repeat the steps. This will apply to all items.
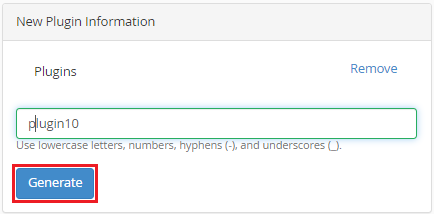
- In the “New Plugin Information” text box, enter the plugin’s name and click “Generate” to create the new plugin installation file.

- Click the link in the banner at the top of the screen to obtain the updated plugin installation file. The file will be saved in the /var/cpanel/cpanel_plugin_generator/ directory in .tar.gz format.
- Afterward, download the plugin installation file and use the following script to install the plugin to the Paper Lantern theme-
# /usr/local/cpanel/scripts/install_plugin
This concludes our article. If still encounter any query, contact our support staff at any difficult moment.
