This guide will walk you through installing the Personal Sign email certificate once you have placed an order.
- Place an order for a Personal Sign email certificate at https://www.eukhost.com/personal-sign.
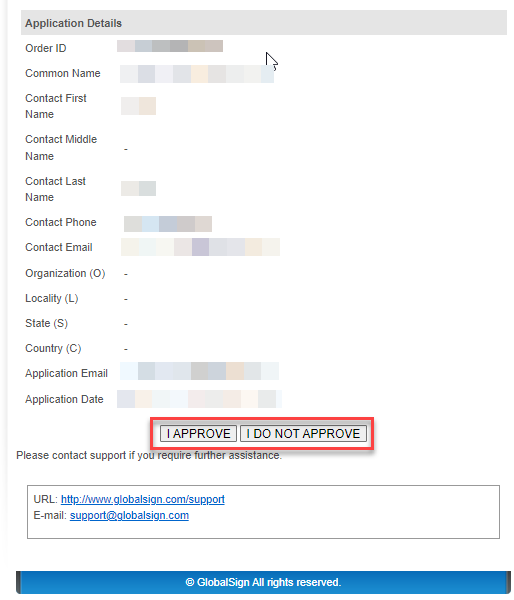
- After your order confirmation email you will receive a second email (Approver mail). This mail will contain a link to initiate the Certificate generation and installation process. Once you click on this link, you will be taken to Global Sign, which issues the certificate on behalf of eukhost. Check your application details and click on, “I APPROVE” button.
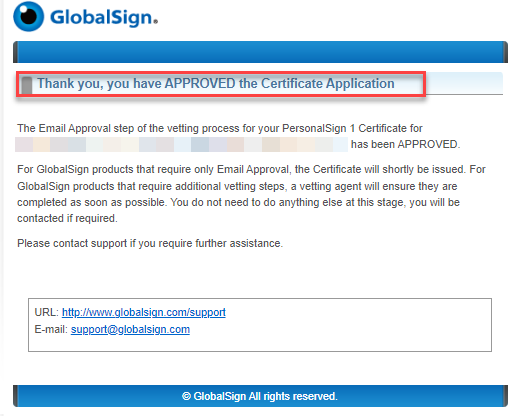
- Once you click “I APPROVE” you will get a message of confirmation.
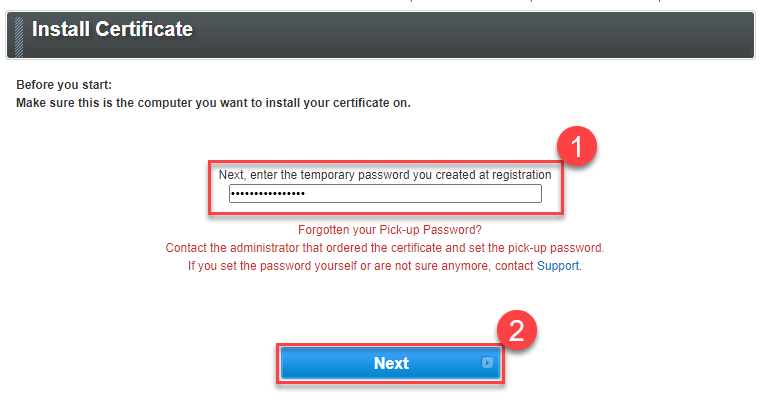
- After approval you will get a third mail which contains instructions for installing and downloading the certificate. Click on the link to be taken to a secure area of Global Sign where you will need to type the temporary password you created on sign up. Once successfully entered click on the “Next” button.
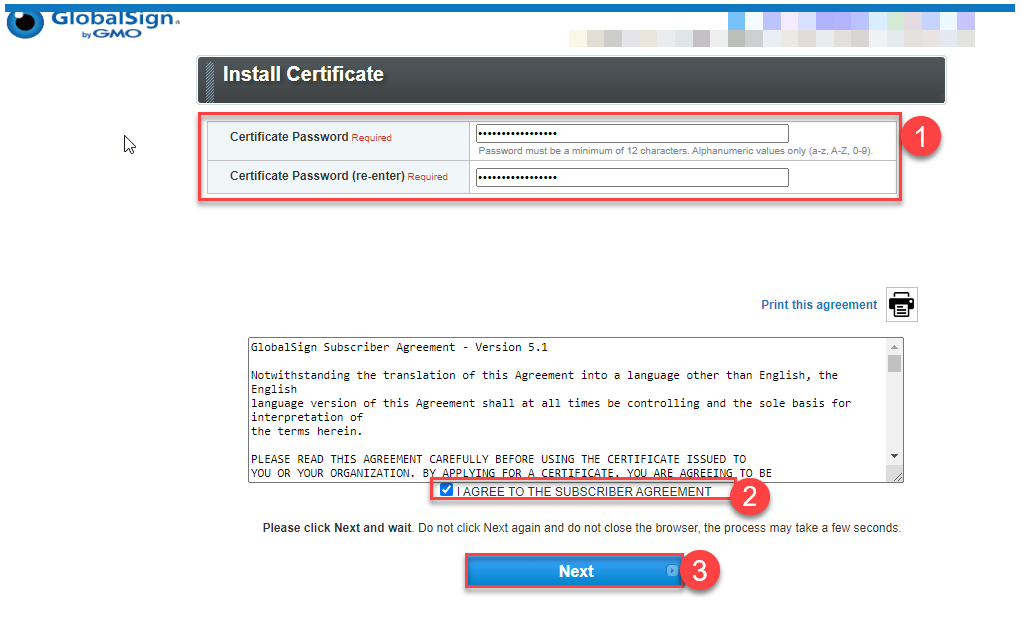
- Now to install the certificate; firstly generate a new secure password, save this password securely then tick the option “I AGREE TO THE SUBSCRIBER AGREEMENT” and click on the “Next” button.
 Note: Make sure you are on the computer you want to install the certificate.
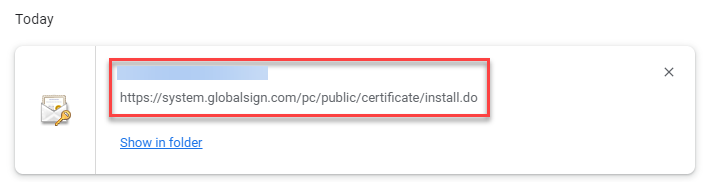
 - You will get a success message that the certificate has been generated. Click on the “Download My Certificate” button.
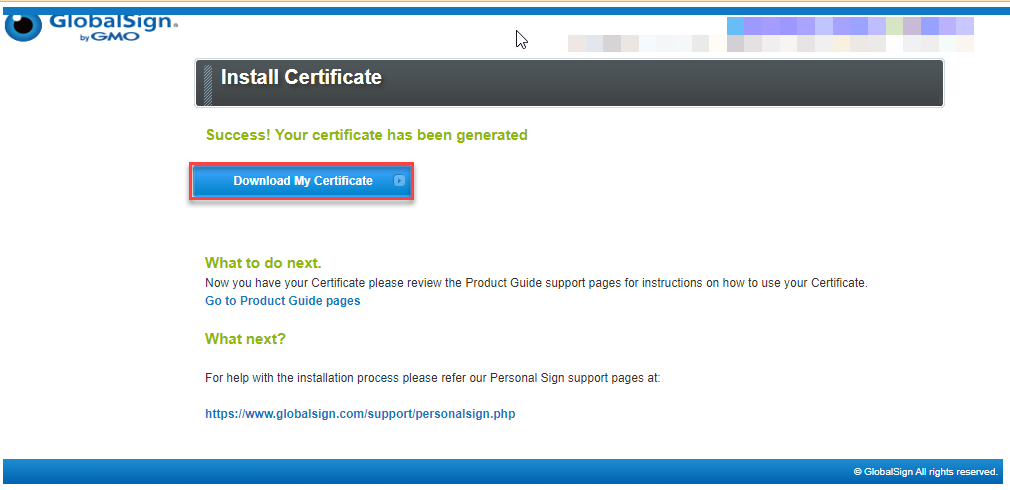
- After downloading, save it in a safe place.
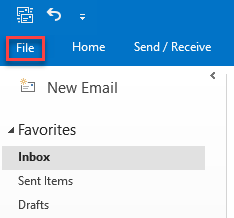
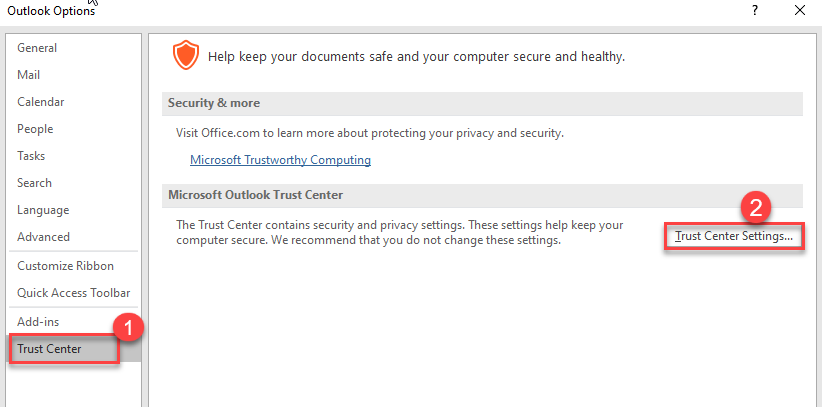
- You will not need to open Outlook email client. Once open click on the “File” option.
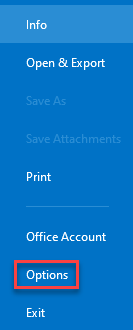
- Then click on “Options”.
- Select “Trust Center” and click on “Trust Center settings…”.
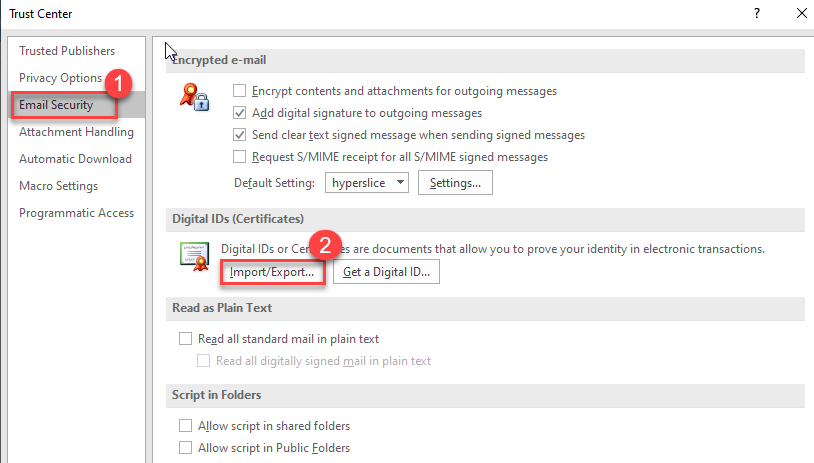
- Then click on the “Email Security” option and click on the “Import/Export” under the “Digital IDs (Certificates)” section.
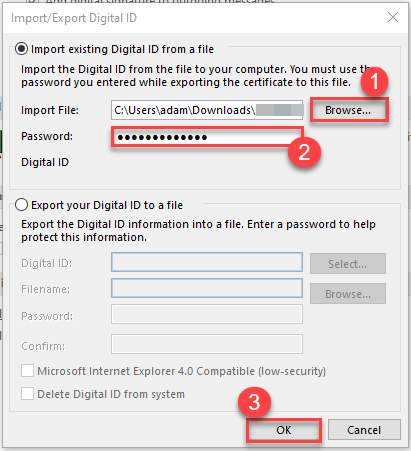
- Browse the file from your PC and enter the “Password” as given below. Click on the “OK” button.
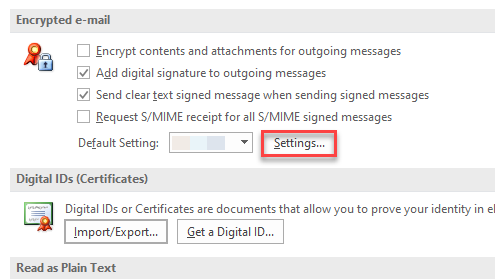
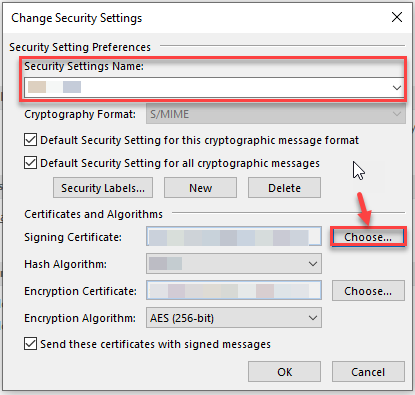
- Now, click on the “Settings” option under “Encrypted e-mail”.
- Choose a “Security Settings Name” of your choice and then find the file of the certificate by clicking on the “Choose…” button as shown below.
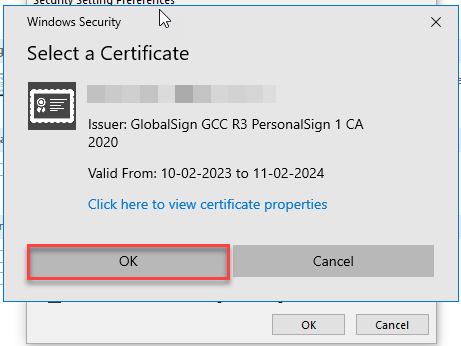
- Once you have found and selected your certificate click on the “OK” button.
- Now, before sending an email you can select “Sign” under “Options”.

- Once your certificate is installed, signed and working the email recipient will see the rosette symbol in their e-mail and you will also see this in your sent box as shown below.

Any problem and if purchased from eukhost our support team are available 24/7 to provide you with any additional help needed via ticket, live chat or call.