This guide explains how to set up email encryption in cPanel. Setting up email encryption in cPanel enhances the security and privacy of email communications by encrypting the content, making it unreadable to unofficial users.
Follow the steps:
- Log in to cPanel.
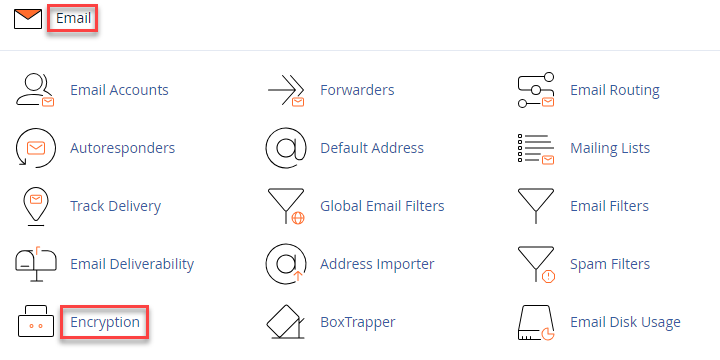
- Select the “Email” section and click on the “Encryption” sub-option.

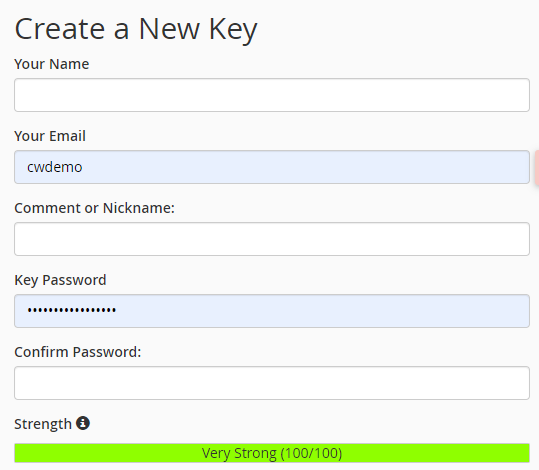
- You will head towards a new page. Fill the form as given below-
- Enter the name in the “Your Name” field.
- Enter email address under the “Your Email” field.
- Add a “Comment or Nickname”.
- Enter the “Key Password” and then again “Confirm Password”. Remember to add a strong password. You can leverage a “Password Generator”.

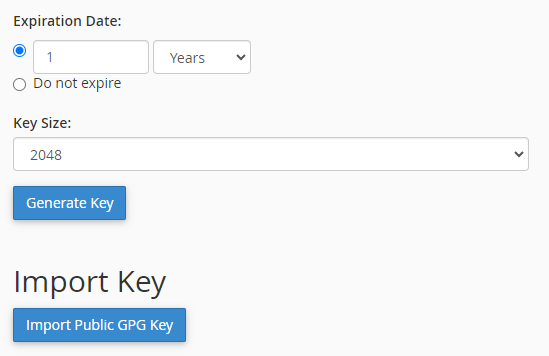
- In the “Expiration Date” field, specify a period for the keys to remain valid. Use “0” for no expiration, and years, weeks, or days, respectively.
- Next, select a “Key Size.”
Note- A larger key size improves mathematical security. However, a 2048-bit key is generally sufficient. Note that larger key sizes may lead to issues with unsupported systems or recipients. - Click the “Generate Key” button. It may take a moment to generate the key.
- Upon success, you will receive a message stating, “The Key has been successfully created.”

- Finally, refresh the page and scroll to the bottom.
This way, you can set up email encryption in cPanel. Hope you liked our article. For latest KBs, visit our site regularly.
