In this article, we have explained how to modify the Web server’s default page for domains with no hosting and in disabled status.
Follow the steps-
- Modifying the web server’s default page-
- Access the Plesk server using SSH (Linux)/ RDP (Windows server).
- Modify the index.html file or substitute it with your own. The file is found-
- On Linux server-
/var/www/vhosts/default/htdocs/ - On Windows Server-
%plesk_vhosts%default\htdocs\
Important note- Please be aware that only index.html is accepted as an index file.
- On Linux server-
- Configuring an established domain to display when accessing domains without hosting or in a disabled state-
- Log in to Plesk.
- Select the “Tools & Settings” option.

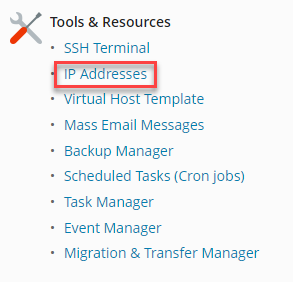
- Click the “IP Addresses” sub-option under the “Tools & Resources” category.
- Select the “IP address” and set the “Default Site”.
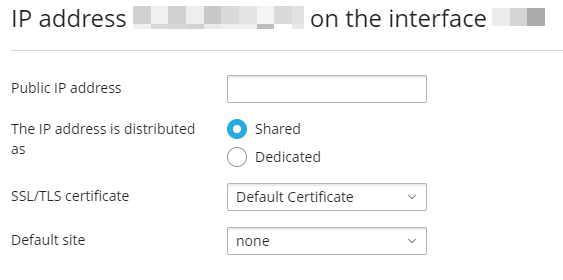
- Click the “OK” button, and you will get a success message.

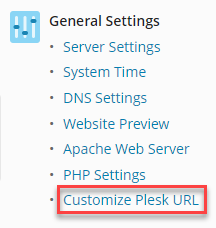
- Navigate to the “Tools & Settings” option and click the “Customize Plesk URL” under “General settings”.
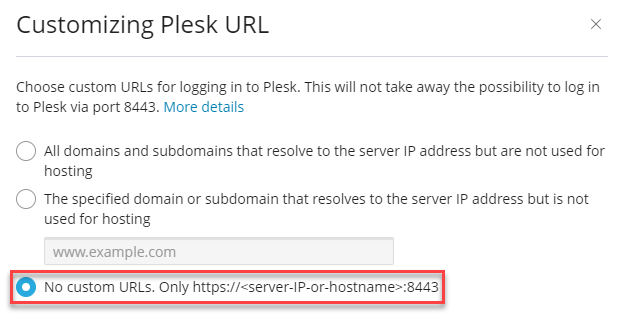
- Select the “No custom URLs. Only https://<server-IP-or-hostname>:8443” option and click on the “OK” button.
- Establishing the display of the Plesk login page when accessing domains without hosting or in a disabled state-
- Log in to Plesk.
- Select “Tools & Settings” and then click on the “Customize Plesk URL” sub-option under “General settings”.
- Select the option, “All domains and subdomains that resolve to the server IP address but are not used for hosting”.
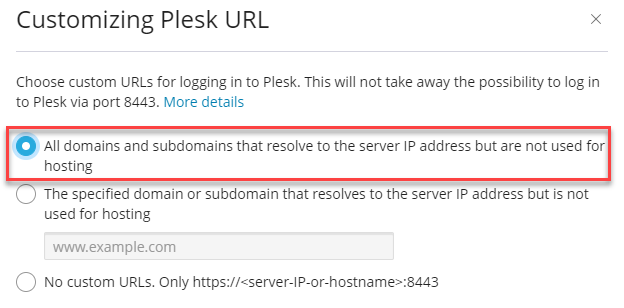
- Click on the “OK” button.
This way, you can modify the Web server’s default page for domains with no hosting and in disabled status. Hope you liked our article.
Related Articles
How to Build Subdomain Outside public_html in cPanelApril 11, 2024
How to Enable or Disable Advanced DNS Zone Editor in WHMJanuary 17, 2024
How to Redirect a Subdomain to another Domain using Additional DirectivesDecember 26, 2023
How to Move a Website from a Subfolder to the base Domain on cPanelSeptember 11, 2023