In this article, we will explain how you can enable or disable the advanced DNS Zone Editor in WHM.
When you are handling cPanel as a reseller, you can choose whether individual cPanel accounts should access the Advanced DNS Zone Editor. The Basic DNS Zone editor offers A and CNAME records without modifying default records.
The Advanced DNS Zone Editor provides A, CNAME, and TXT records, along with the ability to modify default records. As a reseller, you can enable or disable this option for all cPanels through your WebHost Manager (WHM).
Follow these steps to enable or disable the advanced DNS Zone Editor in WHM:
- Log into your WHM.

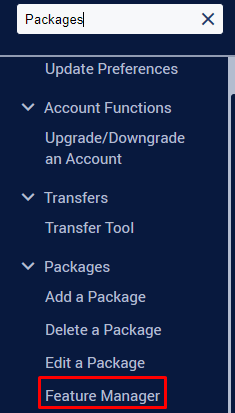
- Find the “Feature Manager” tool under the Packages category.

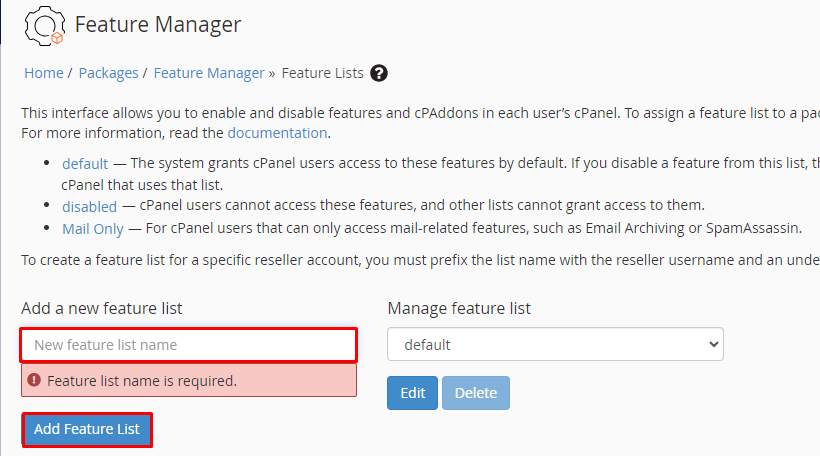
- This takes you to a page where you can choose the feature template list to edit. If there isn’t one, you can create a new list by giving it a name, like “Default.” Click on Add to make the feature template.

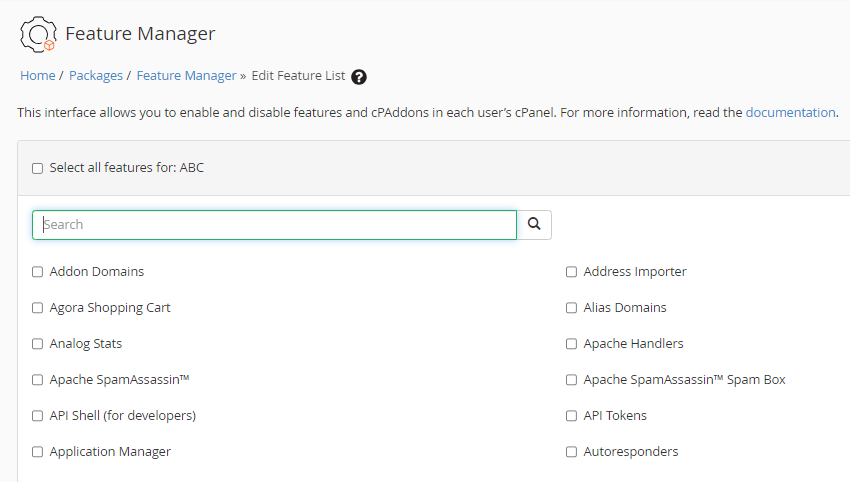
- The name of the new list will show up under the “Edit a Feature List” section. Make sure it’s chosen in the dropdown and click on the Edit button. On this page, you’ll find a list of features for accounts with this list. Choose or unchoose the checkbox next to the “Advanced DNS Zone Editor” field.

- Go to the bottom and click Save. This preserves your settings, and all accounts following this configuration will either have or not have the Advanced DNS Zone Editor as per your setup.
In this way, you can enable or disable the advanced DNS Zone Editor in WHM. For more information, visit our knowledge base section.
