Plesk Panel or just Plesk, in short, is known as one of the most multi-functional Control Panels. It goes far beyond the capabilities of the regular web-based tools for managing the server resources your sites need to exist. Plesk is a complete multi-level hosting platform Control Panel, giving the server administrator a wide range of graphic interface options to set up and maintain a whole hosting business serving the end customer. It is just as good for configuring shared hosting solutions as it is for setting up VPS and dedicated servers. The operating systems supporting Plesk include Fedora, Red Hat, Debian, CentOS, Ubuntu, and Windows.
In this article, we will explain to you how to manage and make DNS changes in Plesk.
Steps to manage the DNS in Plesk-
- First Login to Plesk.
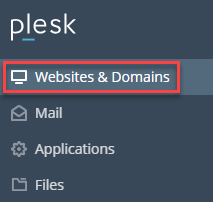
- In the left sidebar, click on the Websites & Domains option.
- Select the domain for which you want to make changes in DNS records.
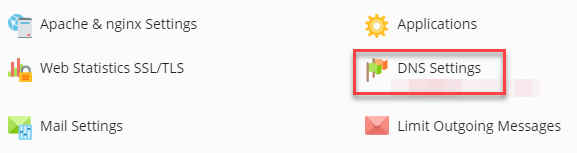
- Now, click on the DNS Settings tab.
- On the DNS tab, you can see many settings available:
- To turn off DNS entirely, click Disable.
- To switch between using the Plesk DNS server as a master or slave, click the Master/Slave option.
Note: If you wish to use an external DNS, make sure you set the Plesk DNS server to act as a slave. - To restore the default DNS settings, click the Reset to Default option.
Steps to Add DNS Records-
You can add many different types of records to the DNS for a domain, for example, CNAME, MX, PTR, and more.
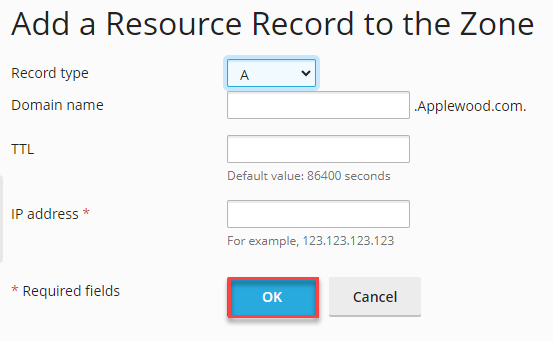
The below procedure describes how to add an A record to the DNS. An A record allows you to point a subdomain to an IP address-
- First Login to Plesk.
- In the left sidebar, click on the Websites & Domains option.
- Select the domain for which you want to make changes in DNS records.
- Now, click on the DNS Settings tab.
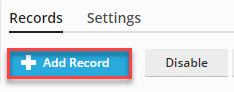
- Click on the Add Record option.
- In the Record type list box, select the type of record you want to create. So we will select A.
- In the Domain name text box, type the name of the subdomain.
- In the IP address text box, type the IP address of the server.
- Click OK. Plesk creates the DNS record but does not activate it. So to activate the record Click on the Update option.
Note: If in case change your mind and don’t want to activate the new record, you can click on the Revert option.
Steps to delete a DNS record-
- First Login to Plesk.
- In the left sidebar, click on the Websites & Domains option.
- Select the domain for which you want to make changes in DNS records.
- Now, click on the DNS Settings tab.
- In the list of records, select the checkbox next to the record that you want to delete.
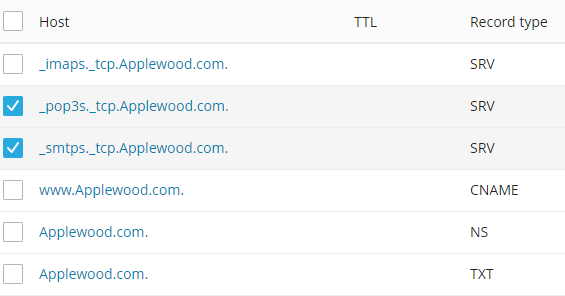
- Click Remove.

- To confirm the record deletion, click on Yes. It will delete the DNS record.
Note: DNS is a complicated issue. Be sure you know what you are doing before you edit any settings – otherwise, you could compromise your site’s connectivity.