The Domain Name System is complex in itself. Using the cPanel control panel, users can easily manage the DNSs. The DNS is added to the WHM interface for that purpose. Updating the A records is one of the regular tasks carried out in the DNS settings. cPanel simplifies this process to a large extent.
We’ve made certain assumptions while writing the information below, We assume that you have BIND running on your Linux web hosting Server, You have the required knowledge of DNS and its entries and More importantly, we assume that you are aware of the consequences of updating the zone file with incorrect details.
You may even prefer to lower the TTL- Time To Live value for the particular domain zone file, before proceeding with updating the DNS record.
This article explains how to update the A record for a specific domain in cPanel.
Follow the Steps:
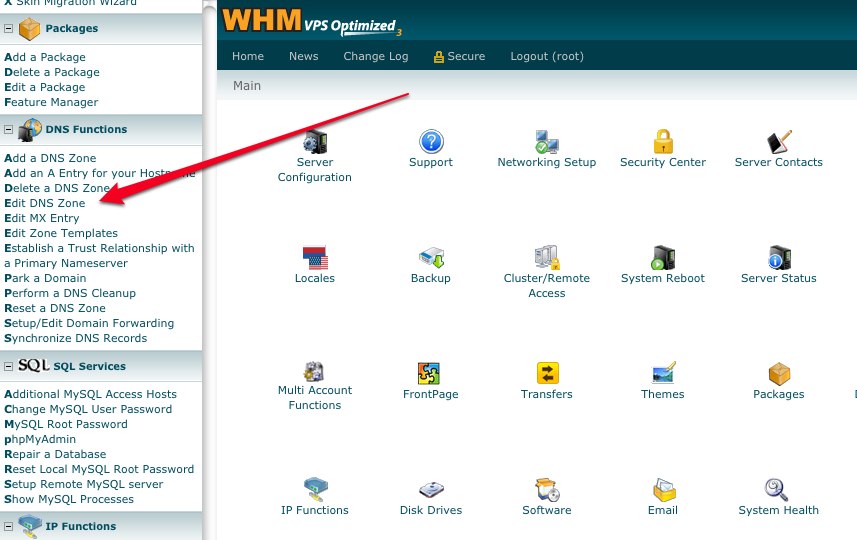
- Login to WHM
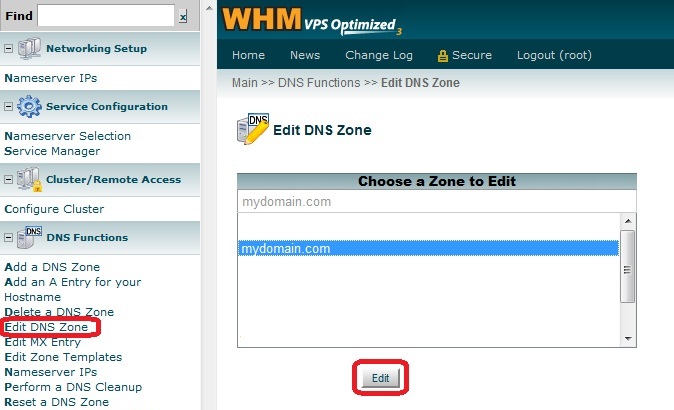
- Find and Hit the Edit DNS Zone option. You’d find it under DNS Functions

- Choose the Domain for which you wish to make the changes and hit the Edit tab

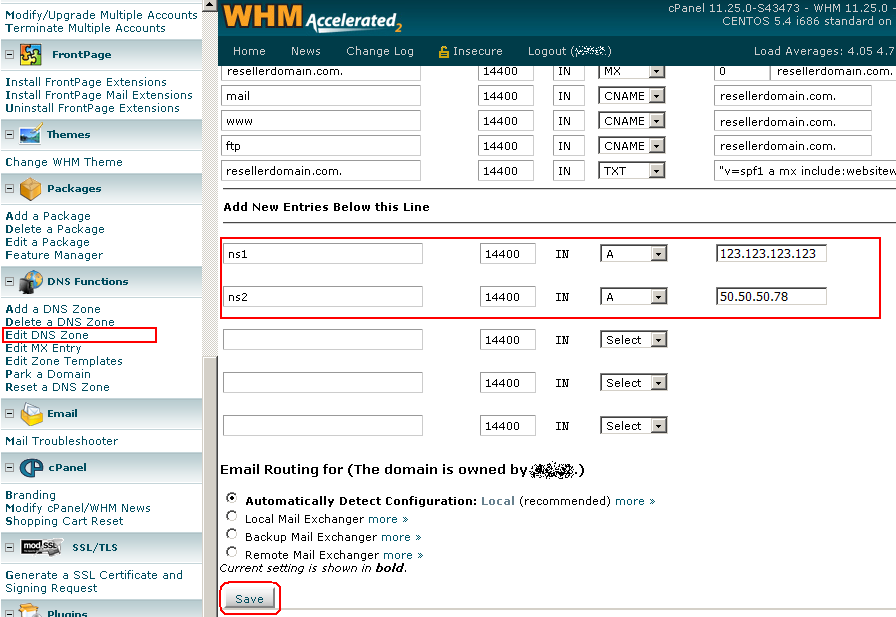
- Look for the line about the ‘ftp’ subdomain, then Update the IP address box to show the new address.
- Recheck the details that you’ve populated, then click the Save button to commit and apply the changes.

Before initiating the process of making the changes, if you’d lowered TTL for that domain, the changes made should start propagating shortly. This indicates to all clients and caching nameservers how often they should check back with the authoritative nameserver for updated information.
When you are about to make any changes to the DNS zone file lowering the TTL value would instruct the caching servers to check back more frequently. Typically 300 seconds (5 minutes) is good primary IP address changes. This should help you keep the downtime to a minimum.
Also Read : How to Remove DNS Zones from WHM
